

Hi Everybody!
I hope you are having a great week so far!
So we are on week #3 of Cereal Box Crafts.
If you missed Project #1 Cereal box to postcard you can find it here: https://goo.gl/F2CuK4
If you missed Project #2 Cereal box to bookmarks and dividers, you can find it here: https://goo.gl/brvJgG
This project was really fun and only took 30 minutes to complete. This would be great for kids or anyone who likes to DIY their supplies.
This is a great back to school craft!
I had a bunch of loose graph paper just sitting in a drawer….for like years! So I decided to use it in this project in the hope that I would use it. And you know what…I think I will. I really like this project a whole bunch. It is also a great excuse to gather all those loose pages and turn them into something useful.
So here we go!
Cereal Box into Notebook
Gathering your supplies:
Corner Punch
Duct Tape or Washi Tape
Scissors
Hole Punch
Cereal Box
String
Loose Paper
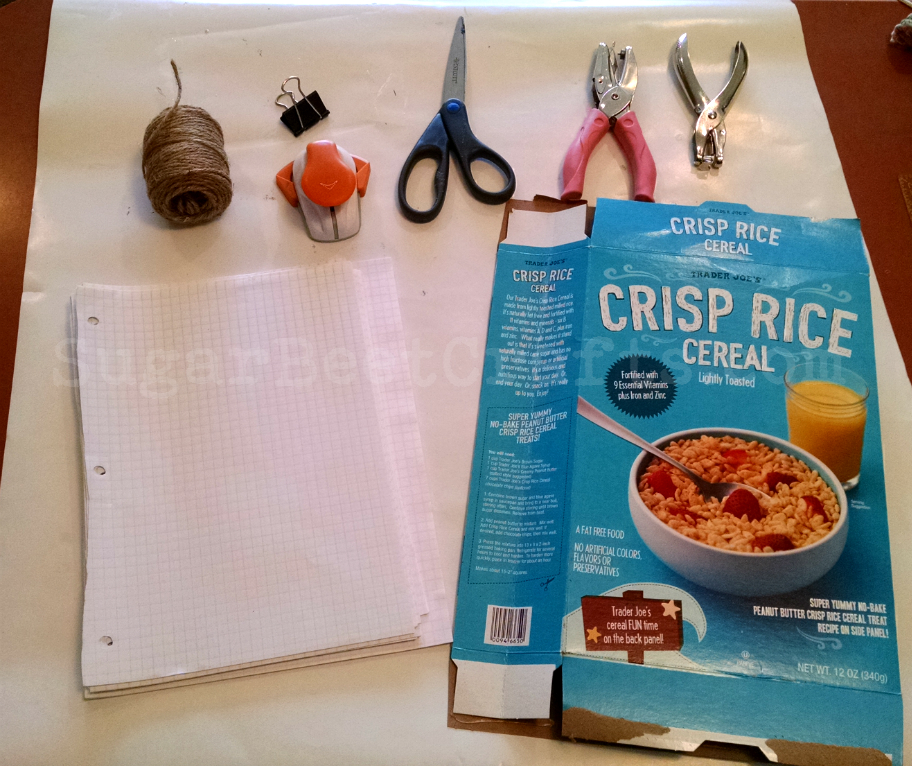
Make sure you find a box that will be large enough for the paper you choose to use.
Steps:
1. With box still intact, undo the flaps from the top and bottom of the box, so that you can lay it flat.
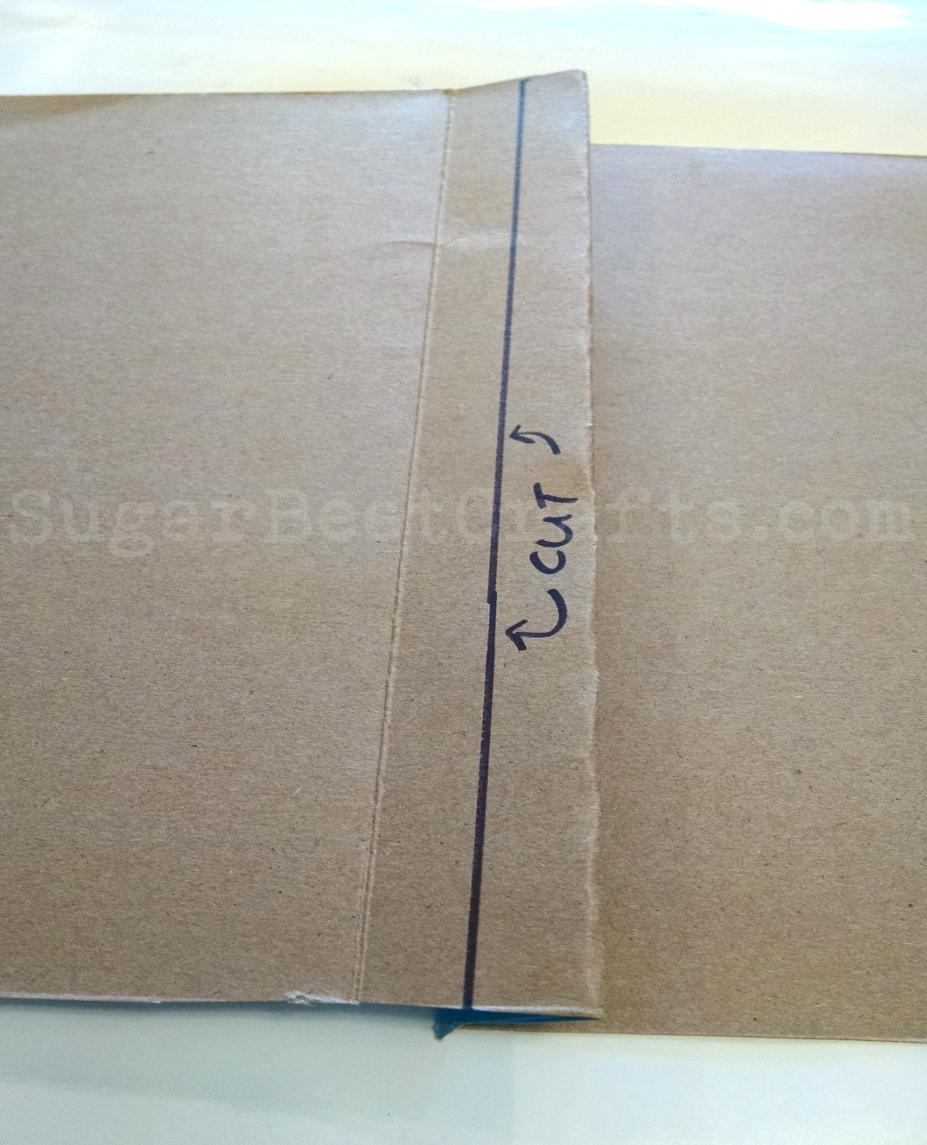
Take the left side of the long side of the cereal box and fold it down the center, Bringing the side of the front and back of the box together.
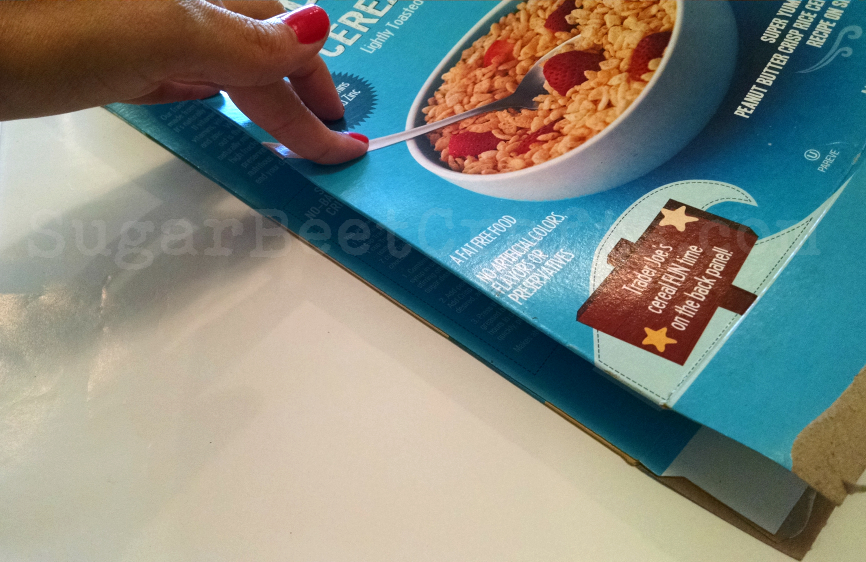
2. Keep the side of the box with the folded edge together, then cut off the top and bottom flaps and the remaining unfolded side. Discard extra pieces.
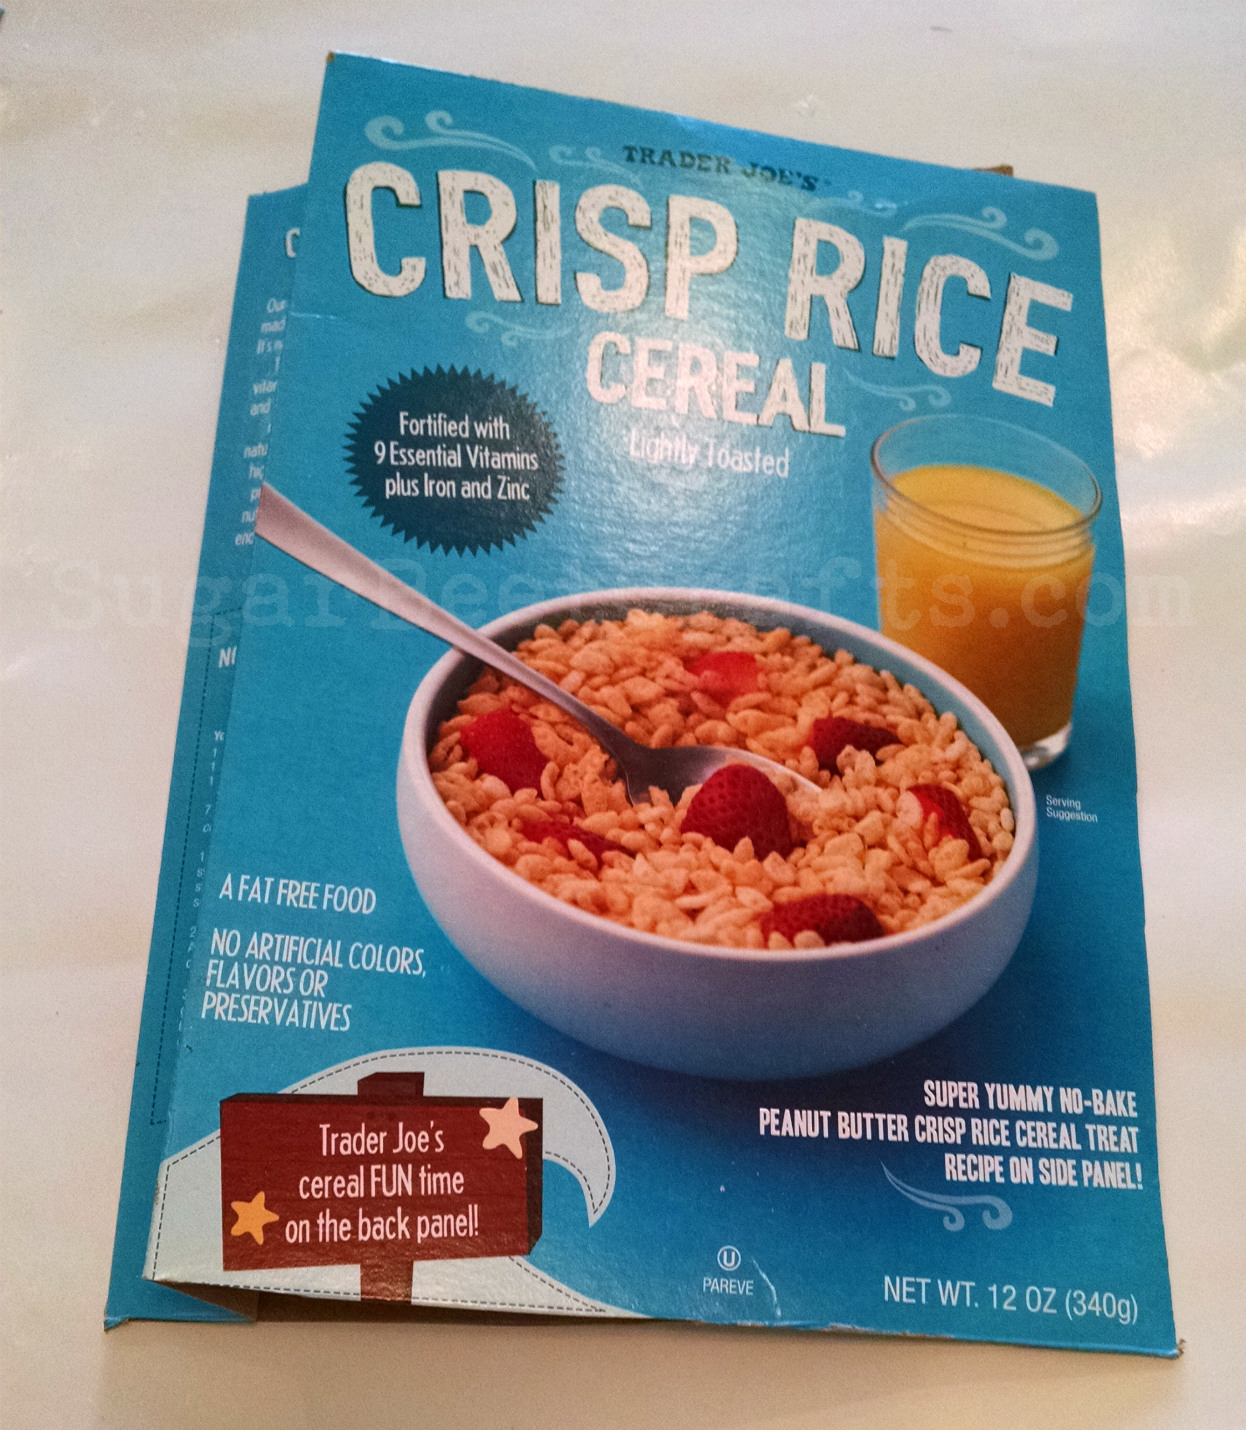
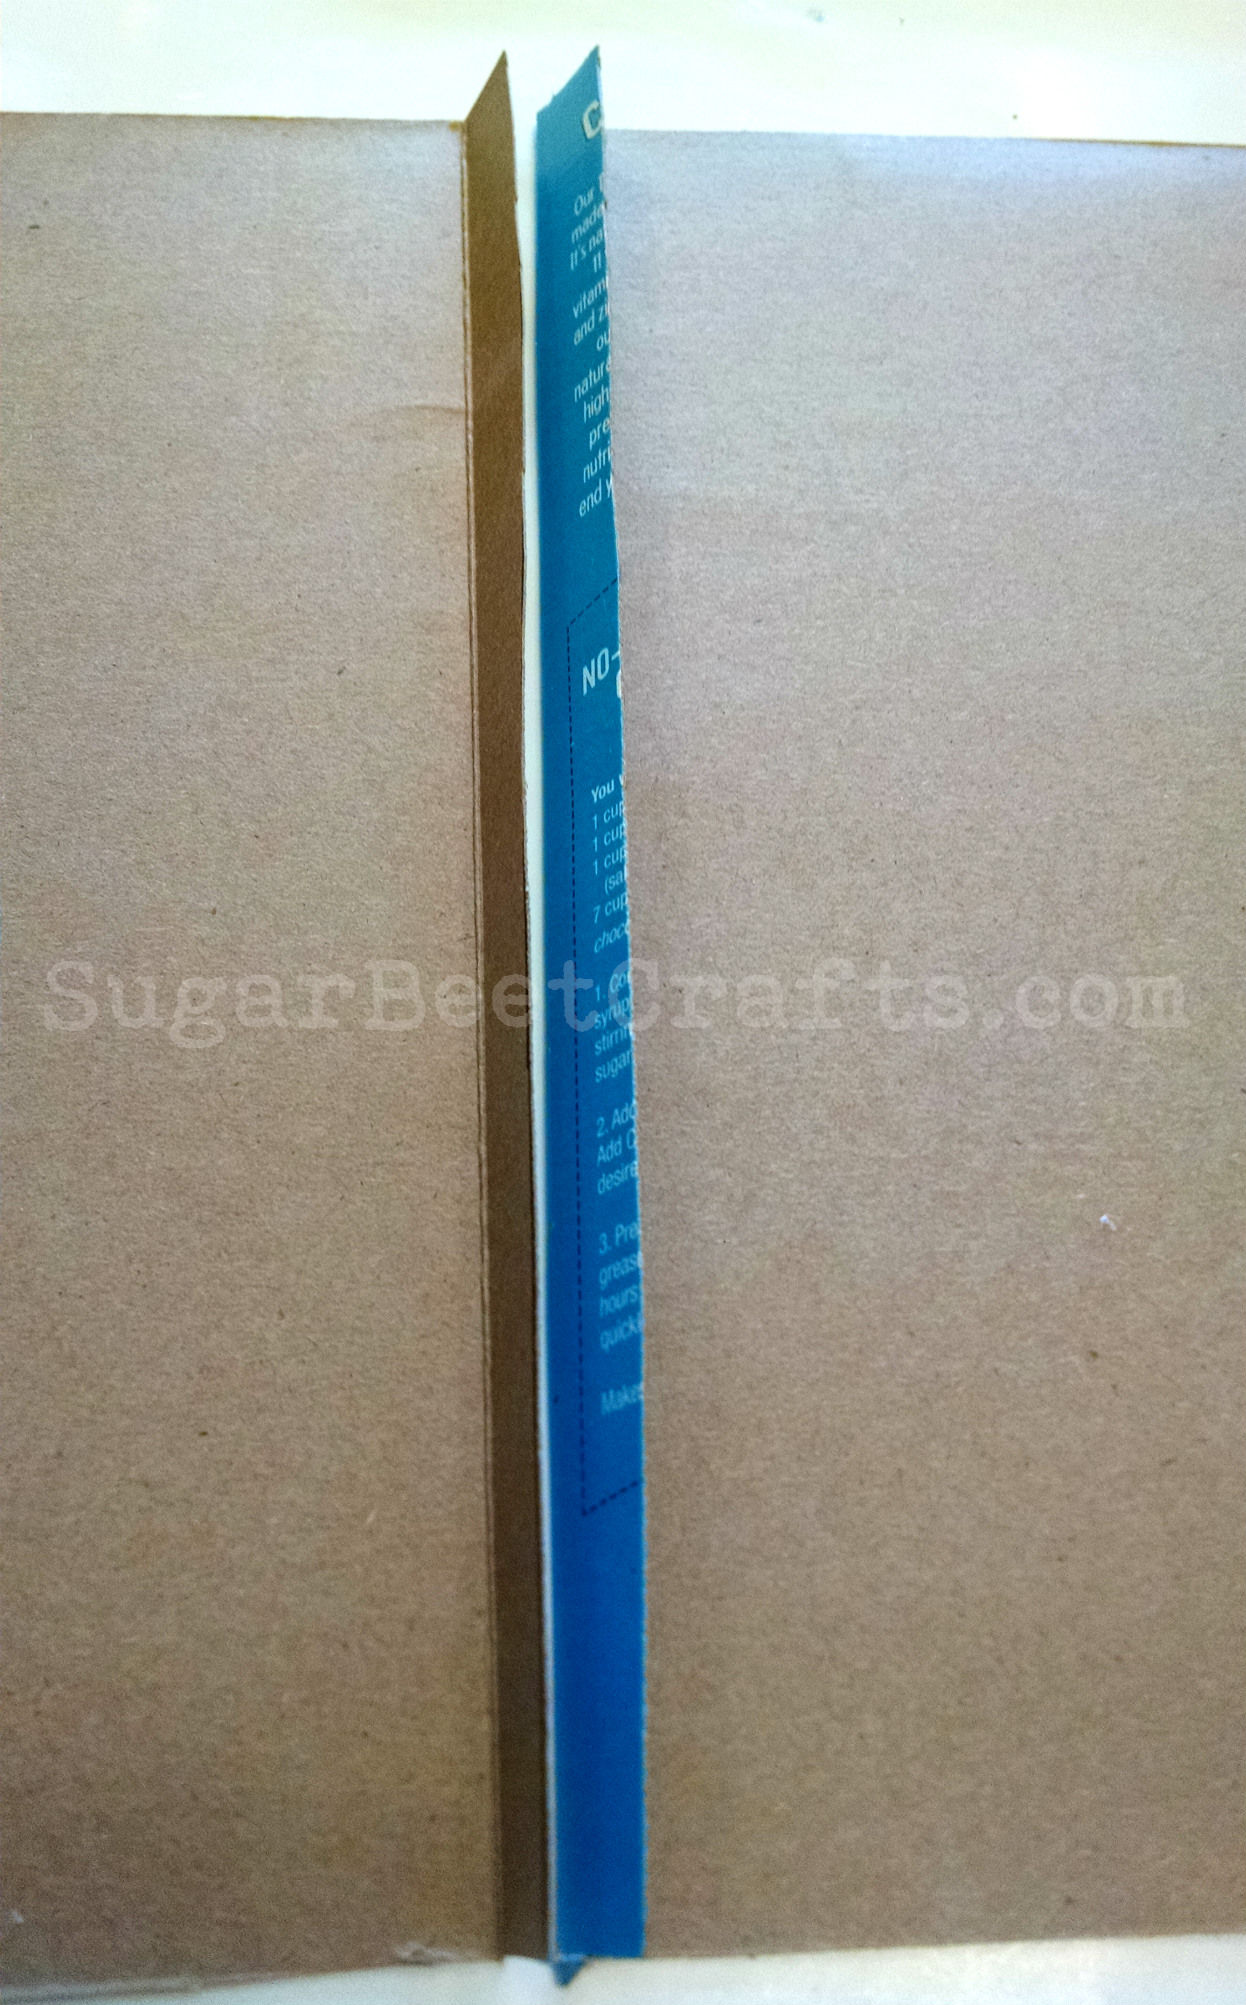
Now if you open up the main piece you have a front, back and the folded side.
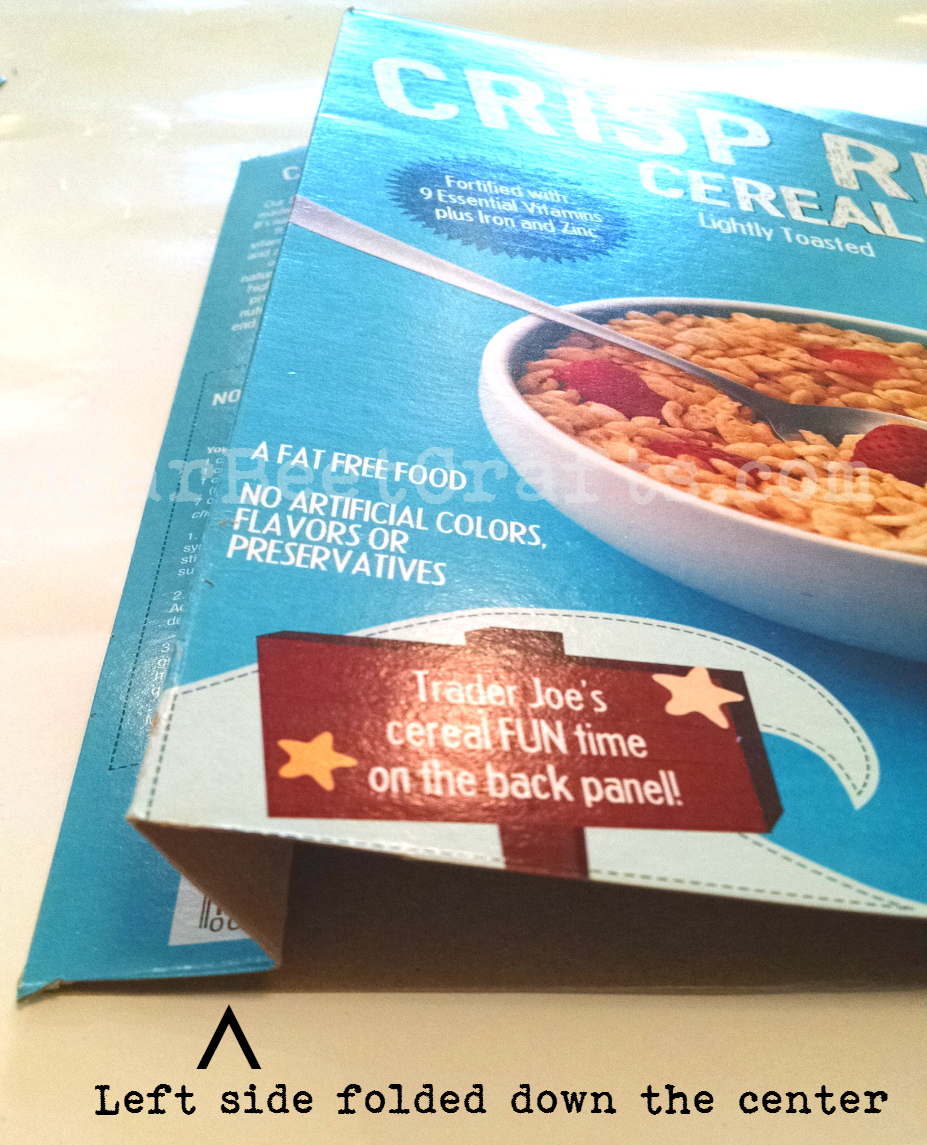
3. Keep the folded side folded and cut off about ½ inch or so from the bend. You are going to sandwich the paper between the two left over pieces, so make sure piece you are leaving attached is large enough for the hole punch.
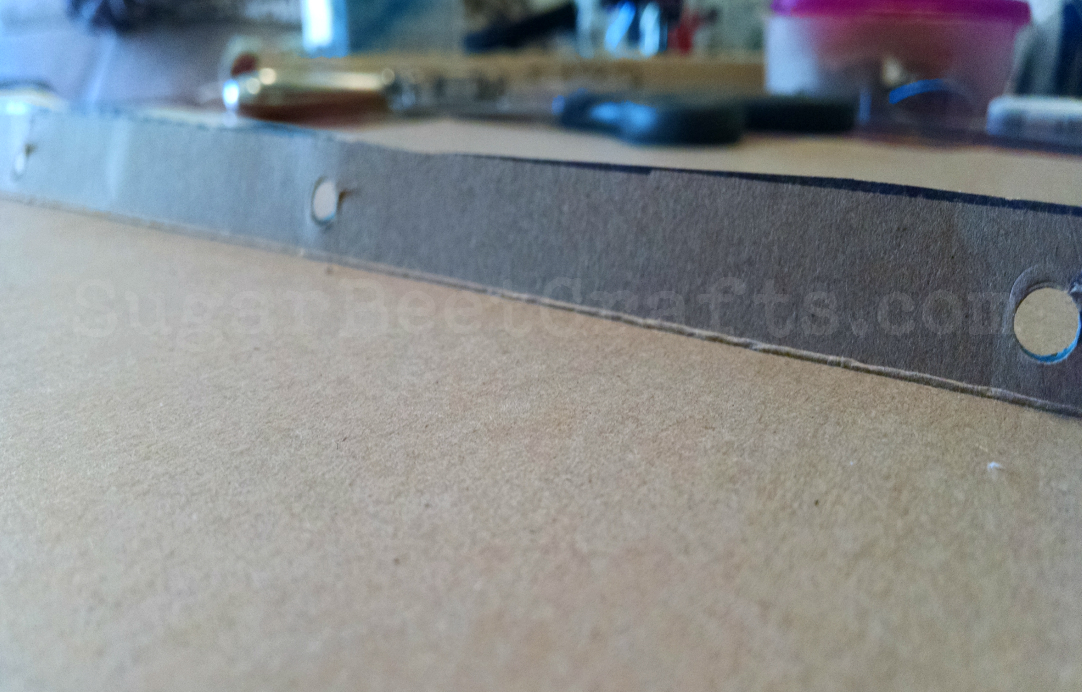
At this point you should have the front and back of the box with a tiny folded edge along the inside of both.

4. Line your paper between the two folded edges and mark where the holes of the paper are. If you are using paper with no holes. You will want to hole punch your paper first, then line up the paper with your cereal box.

5. Once your holes are marked, make your punches. They need to be on both the front and back cover little flaps.
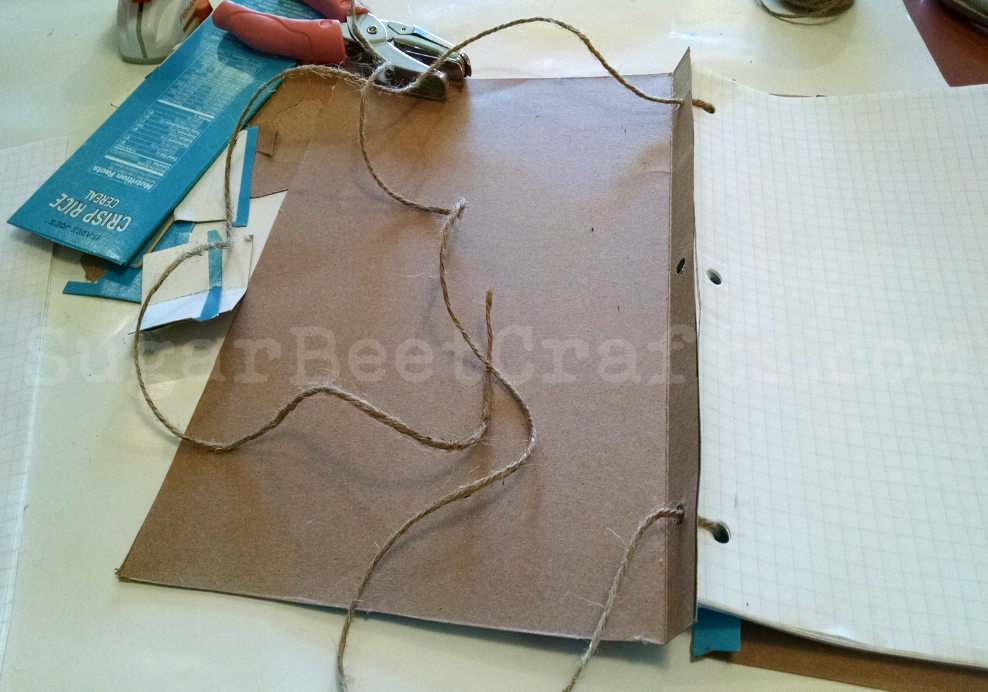
6. Now grab some string or twine or even ribbon, and we are going to string everything together. I started with the back flap first. I strung one end of the twine in the top hole and one in the very bottom.
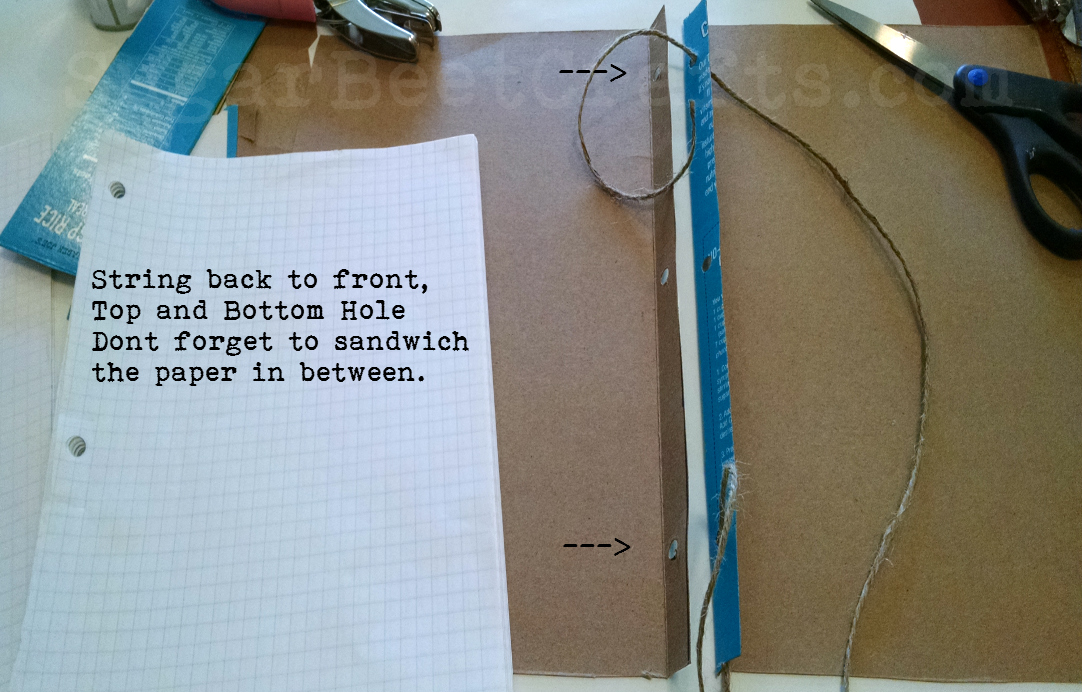
Add the string through the corresponding hole in the paper, then go out through the flaps of the top.
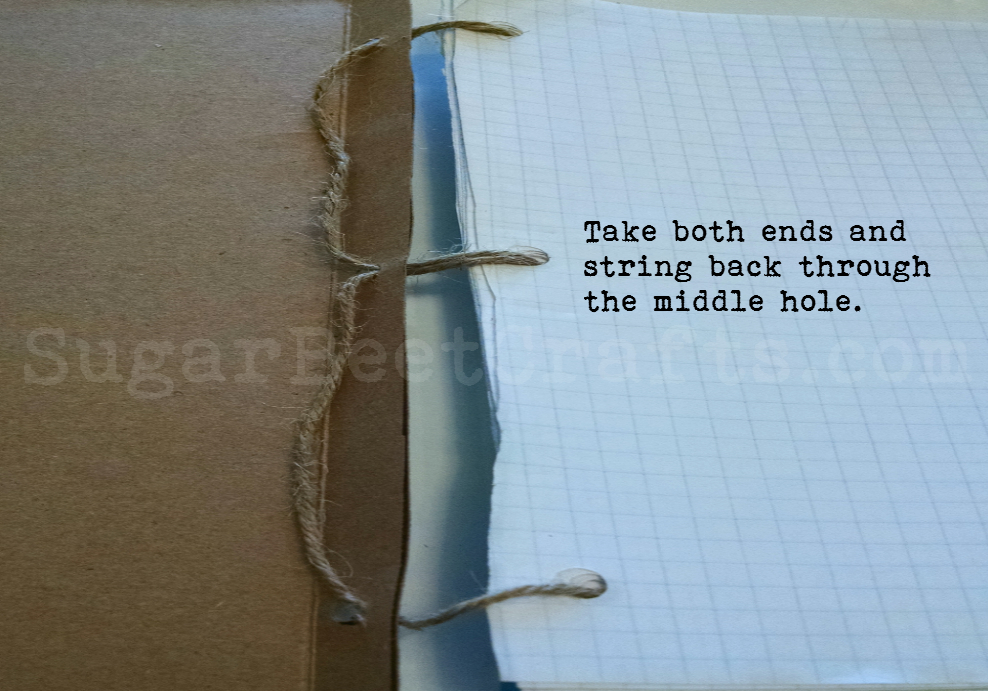
7. You should have two strings coming out from back, take both those strings, put them together and string them through the middle hole together. Once the strings are on the back side, pull tight.
8. Repeat one more time. Take the strings that are now in the middle hole, separate and string one through the top and one through the bottom holes back through to the front. Then once in the front, gather both and string them back through the center hole.
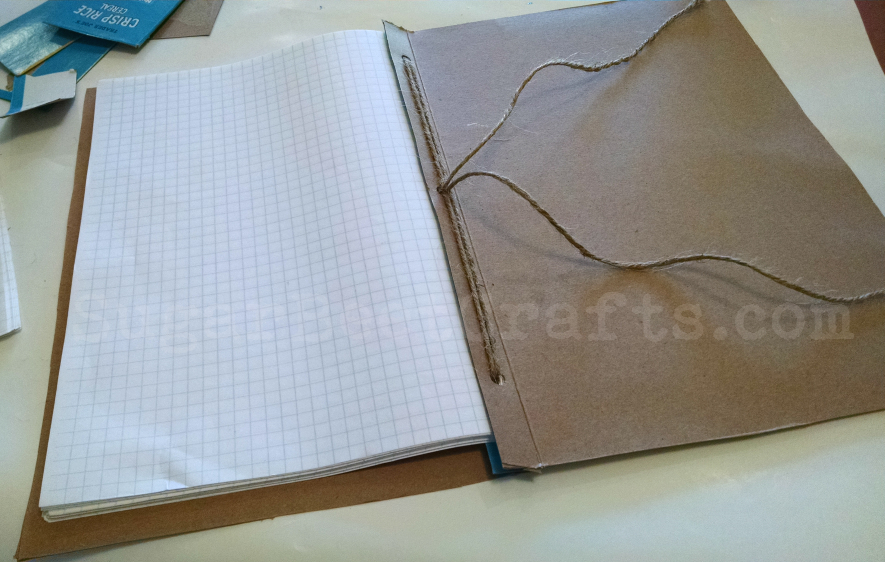
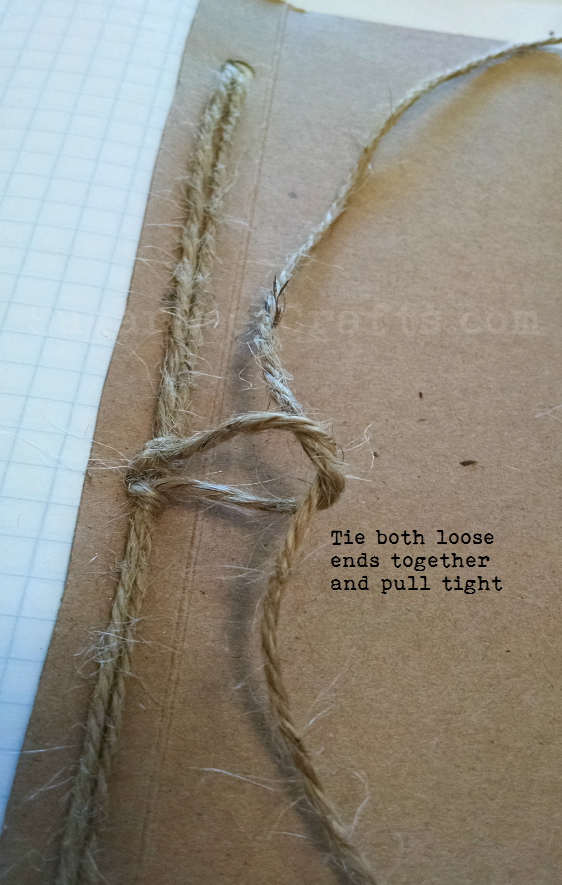
9. Now all strings should be in the back. Pull Tight.
Knot both sides of the string to the existing string.

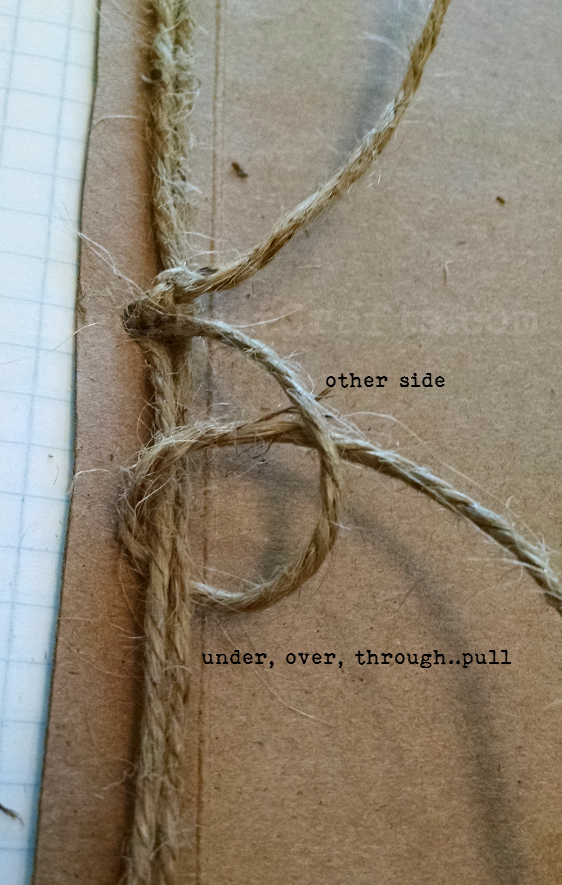
10. Then I knotted them together and cut off the excess.

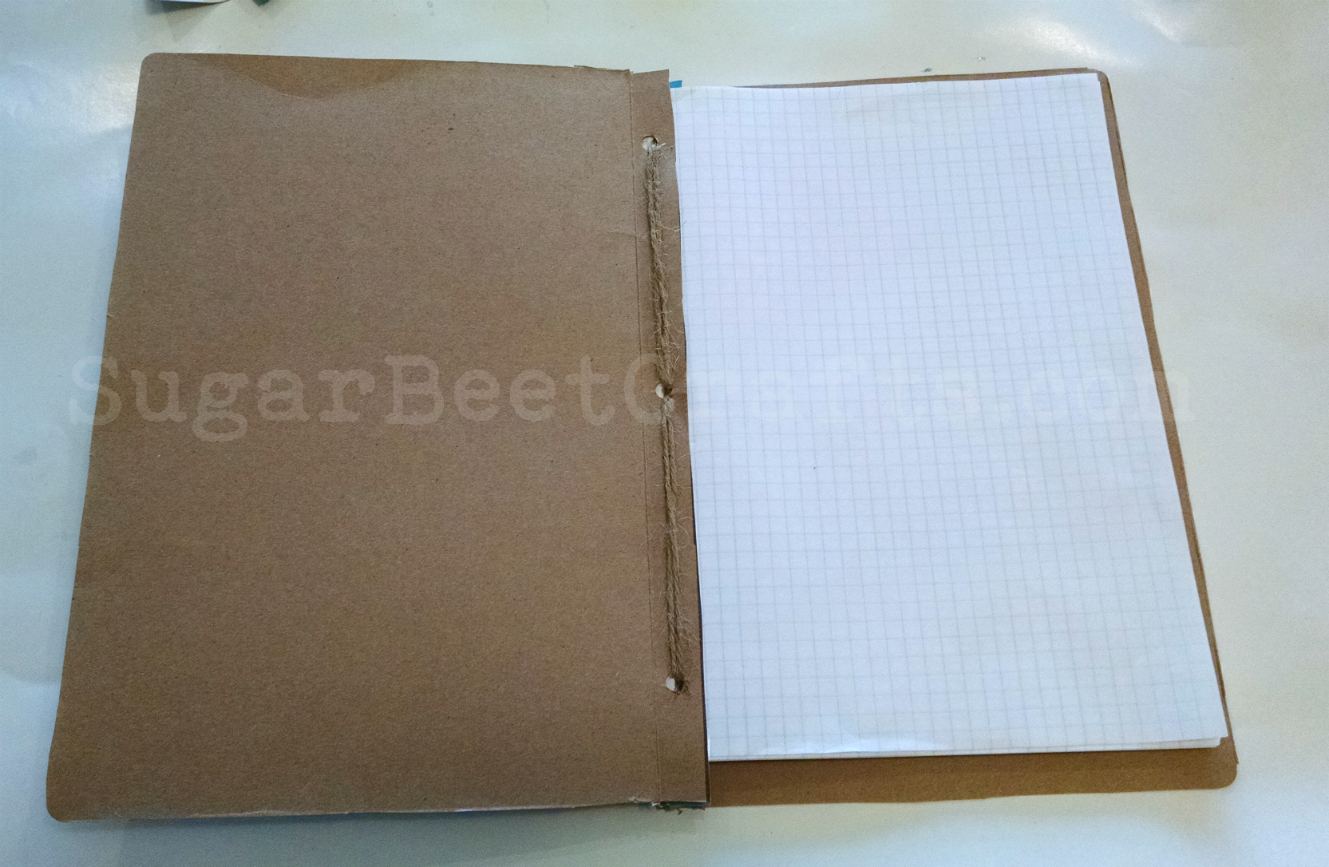
Opened up.
10. Now when you close it, It has a raw edge with the side of the pages sort of sticking out. To make it look more neat, I used duct tape and covered the side. You can also used washi tape, I just happened to have duct tape on hand.


11. For the final touch, I used a corner rounder to round the corners of the cereal box. Completely optional.
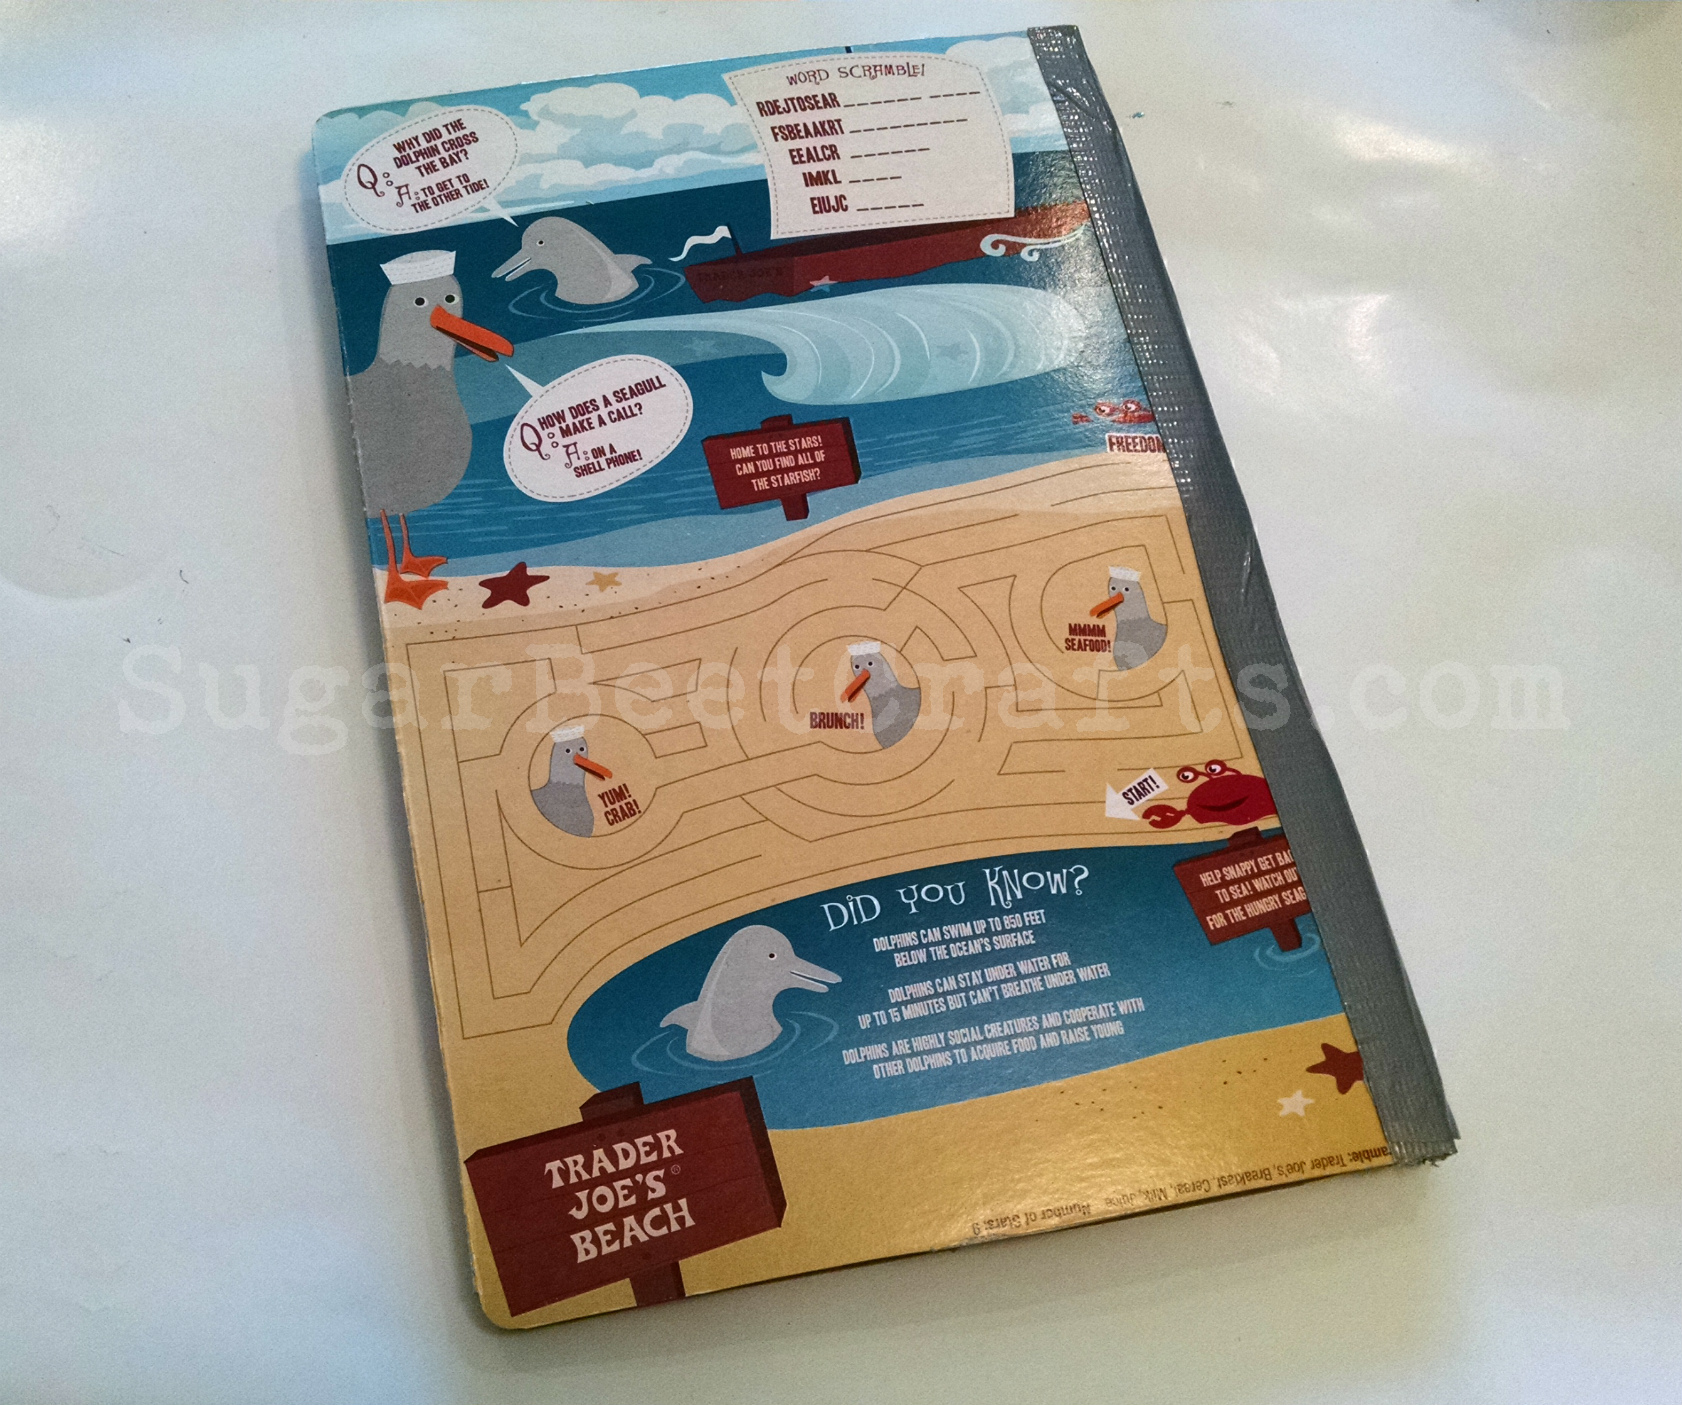
And you’re done! Woo hoo Cereal Box notebook. Bonus, it has a game on the back!
You can always take this a step further and use Mod Podge to cover it with paper or fabric. Or use gesso to make a white background and you can decorate it all yourself.
I personally like the box showing. It would be super cute with different boxes.
I hope you all like this one! Let me know how yours come out or what you think.
Have a wonderful weekend, Happy Crafting!

