
Tutorial Title: Iron Skillet Handle Covers
Written By: Brandie @ Sugar Beet Crafts
Tutorial Description:
Cast iron skillet handle covers are a great way to accessorize and keep safe in the kitchen.
Most “coated” cookware can be toxic after time. In an effort to be healthy we decided in our home to use only cast iron skillets. After burning myself a few times the light bulb in my head went off, “I should make some handle covers!” I found the perfect fabric, so lets get sewing!
I used a colored thread so you can see the stitches, but you might want to use a thread color that matches the seam binding. I am still new at sewing (and this is my first attempt at this project) so please excuse the crude stitching.
Materials Needed:
-
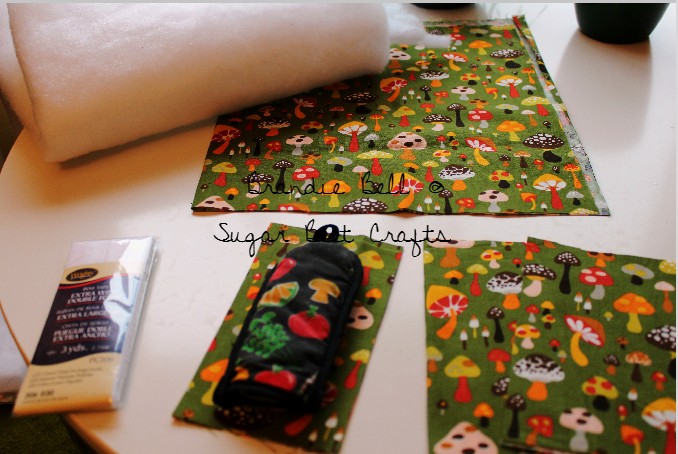
(4) pieces of material 3 1/2 x 1 inches (two for inside, two for outside)
-
(4) pieces of batting (like polyfil)
-
seam binding – the size of the binding depends on your actual pan handle. You need enough to go around your handle and two short ones for the opening. Mine was aproxomately 15 inches
Instructions:
Step 1: Gather up all your materials

Gather all your materials
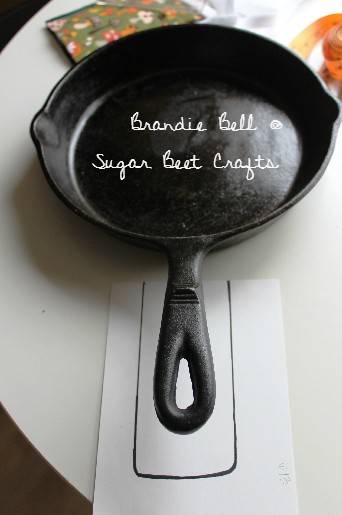
Step 2: Make a template for your pan handle cover. I used my biggest pan, this way I can make one size that works with all of your pans.

Measure your handle
Grab a ruler, a big index card and a sharpie. Trace a square all the way around your handle. Make it about an inch larger than the handle to allow for seams.
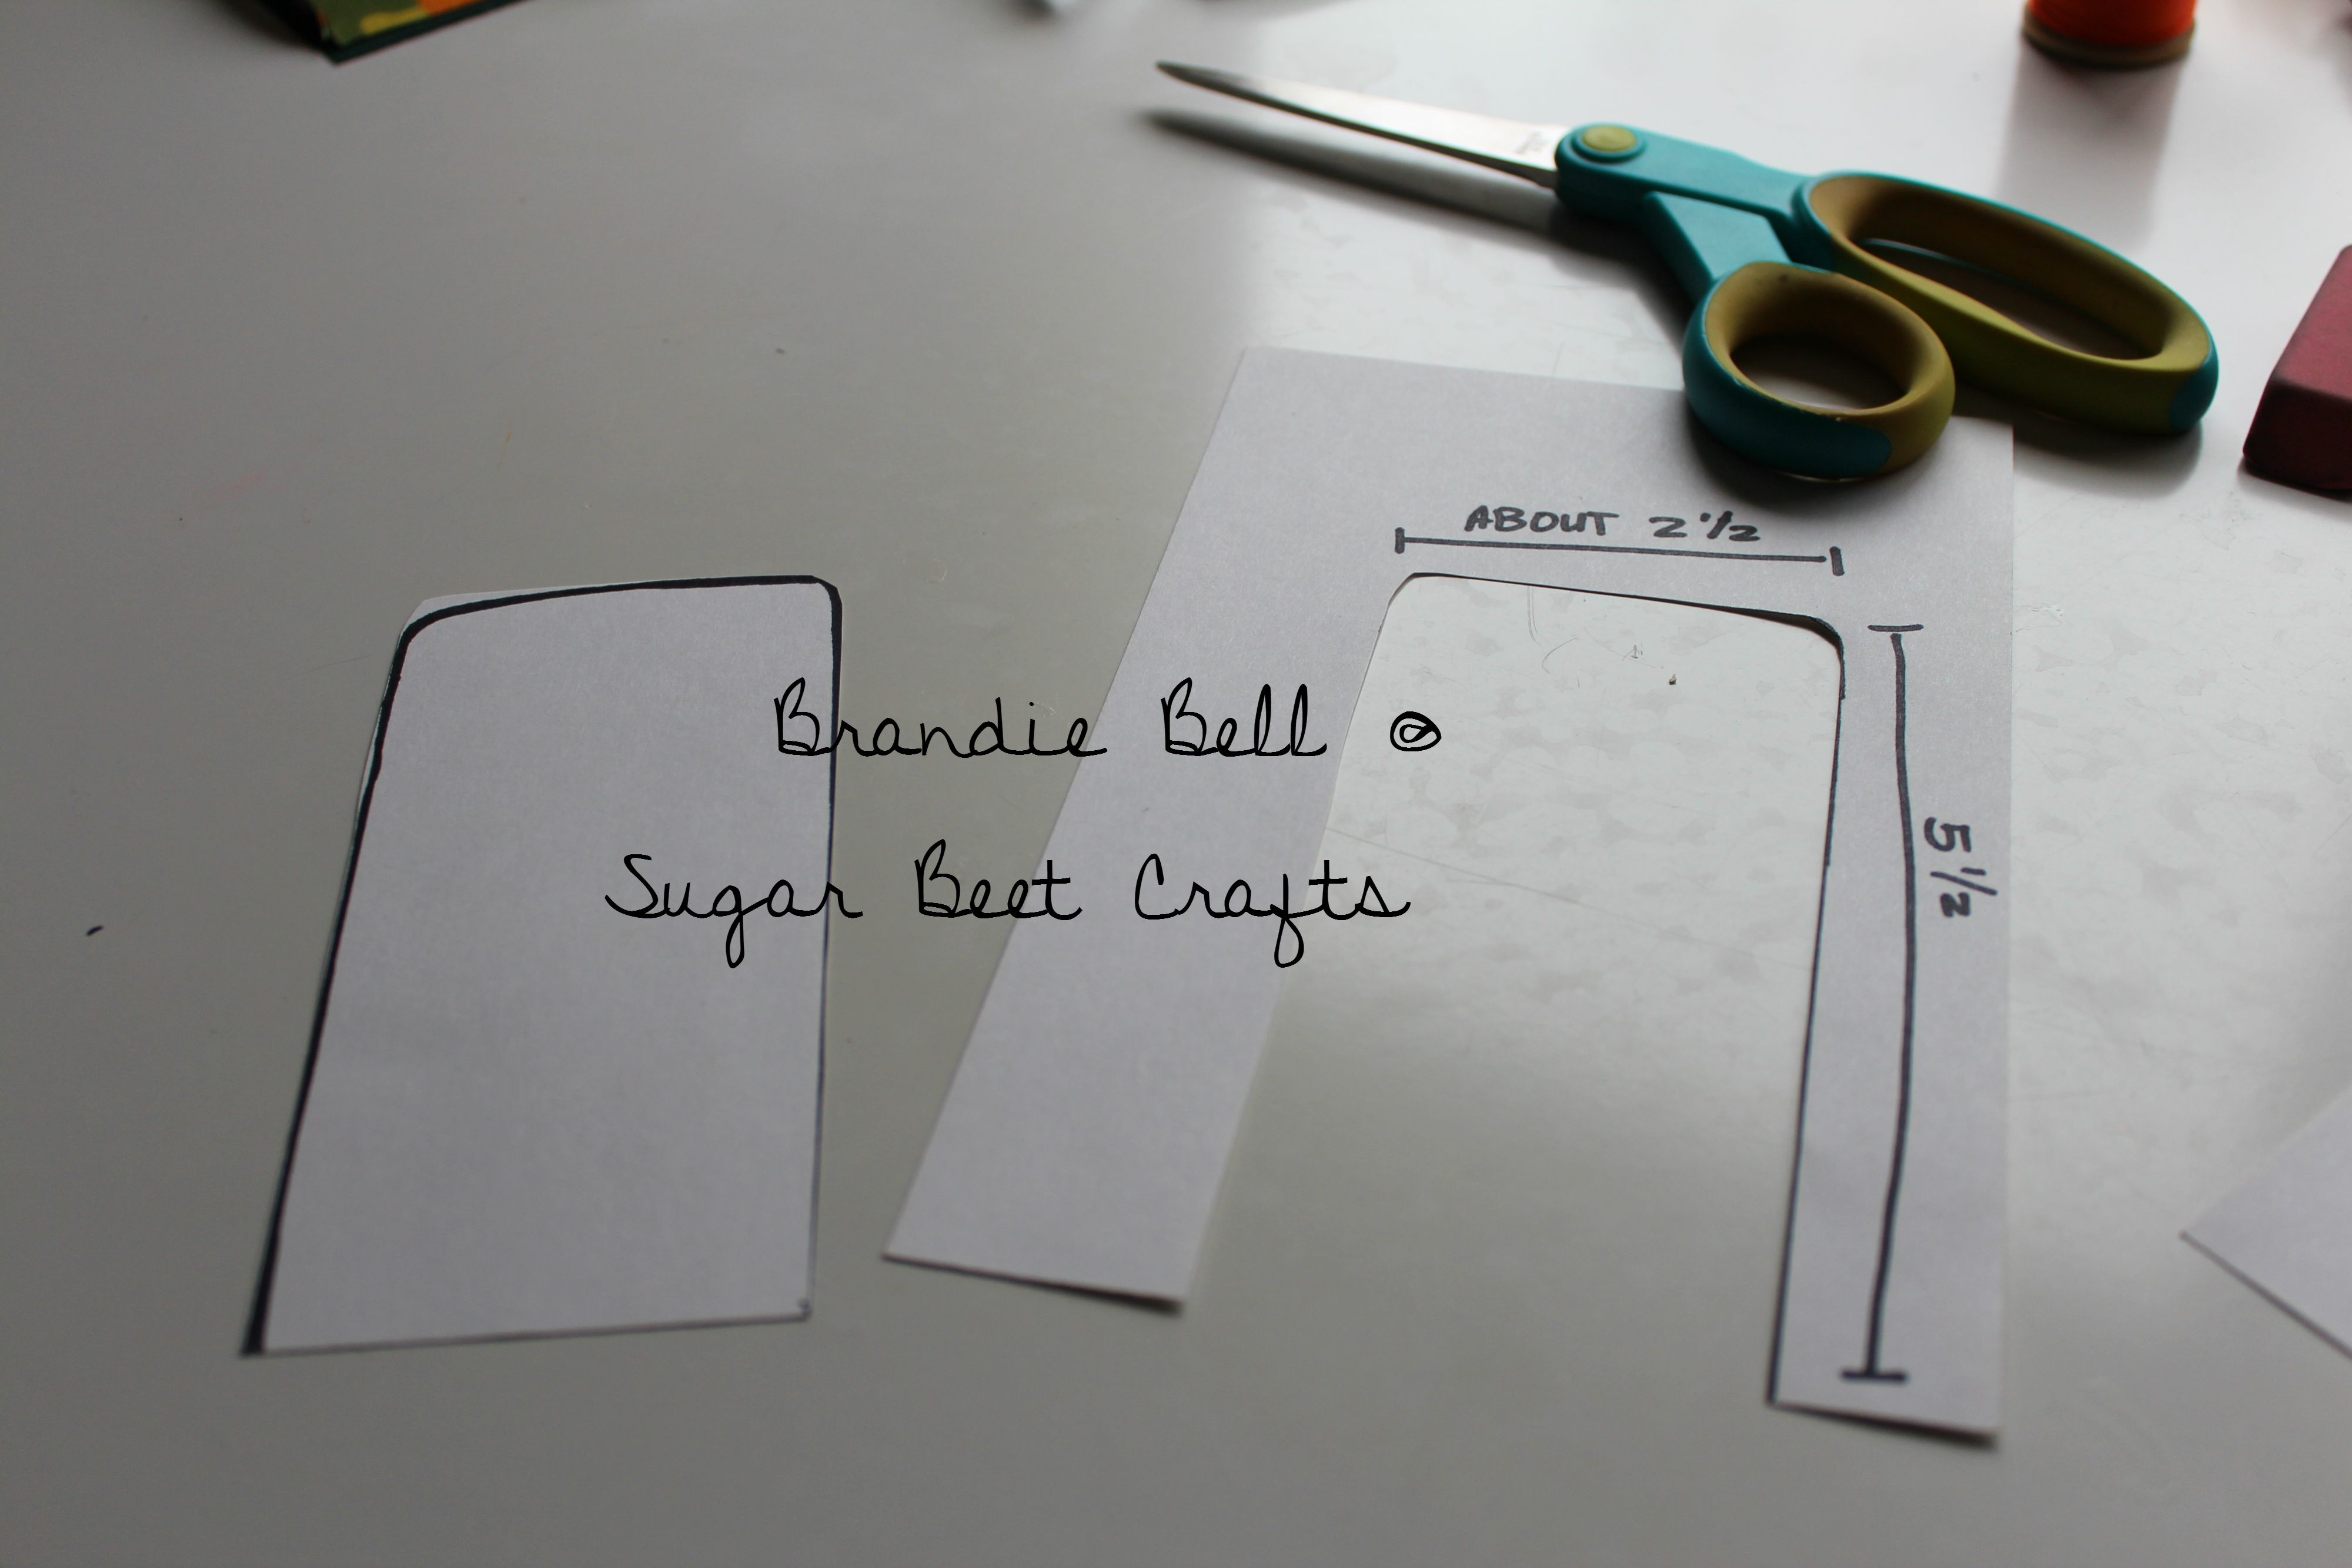
Step 3: My panhandle was 2 1/2 x 5 1/2. Cut out your template.

Measure and cut out handle templates
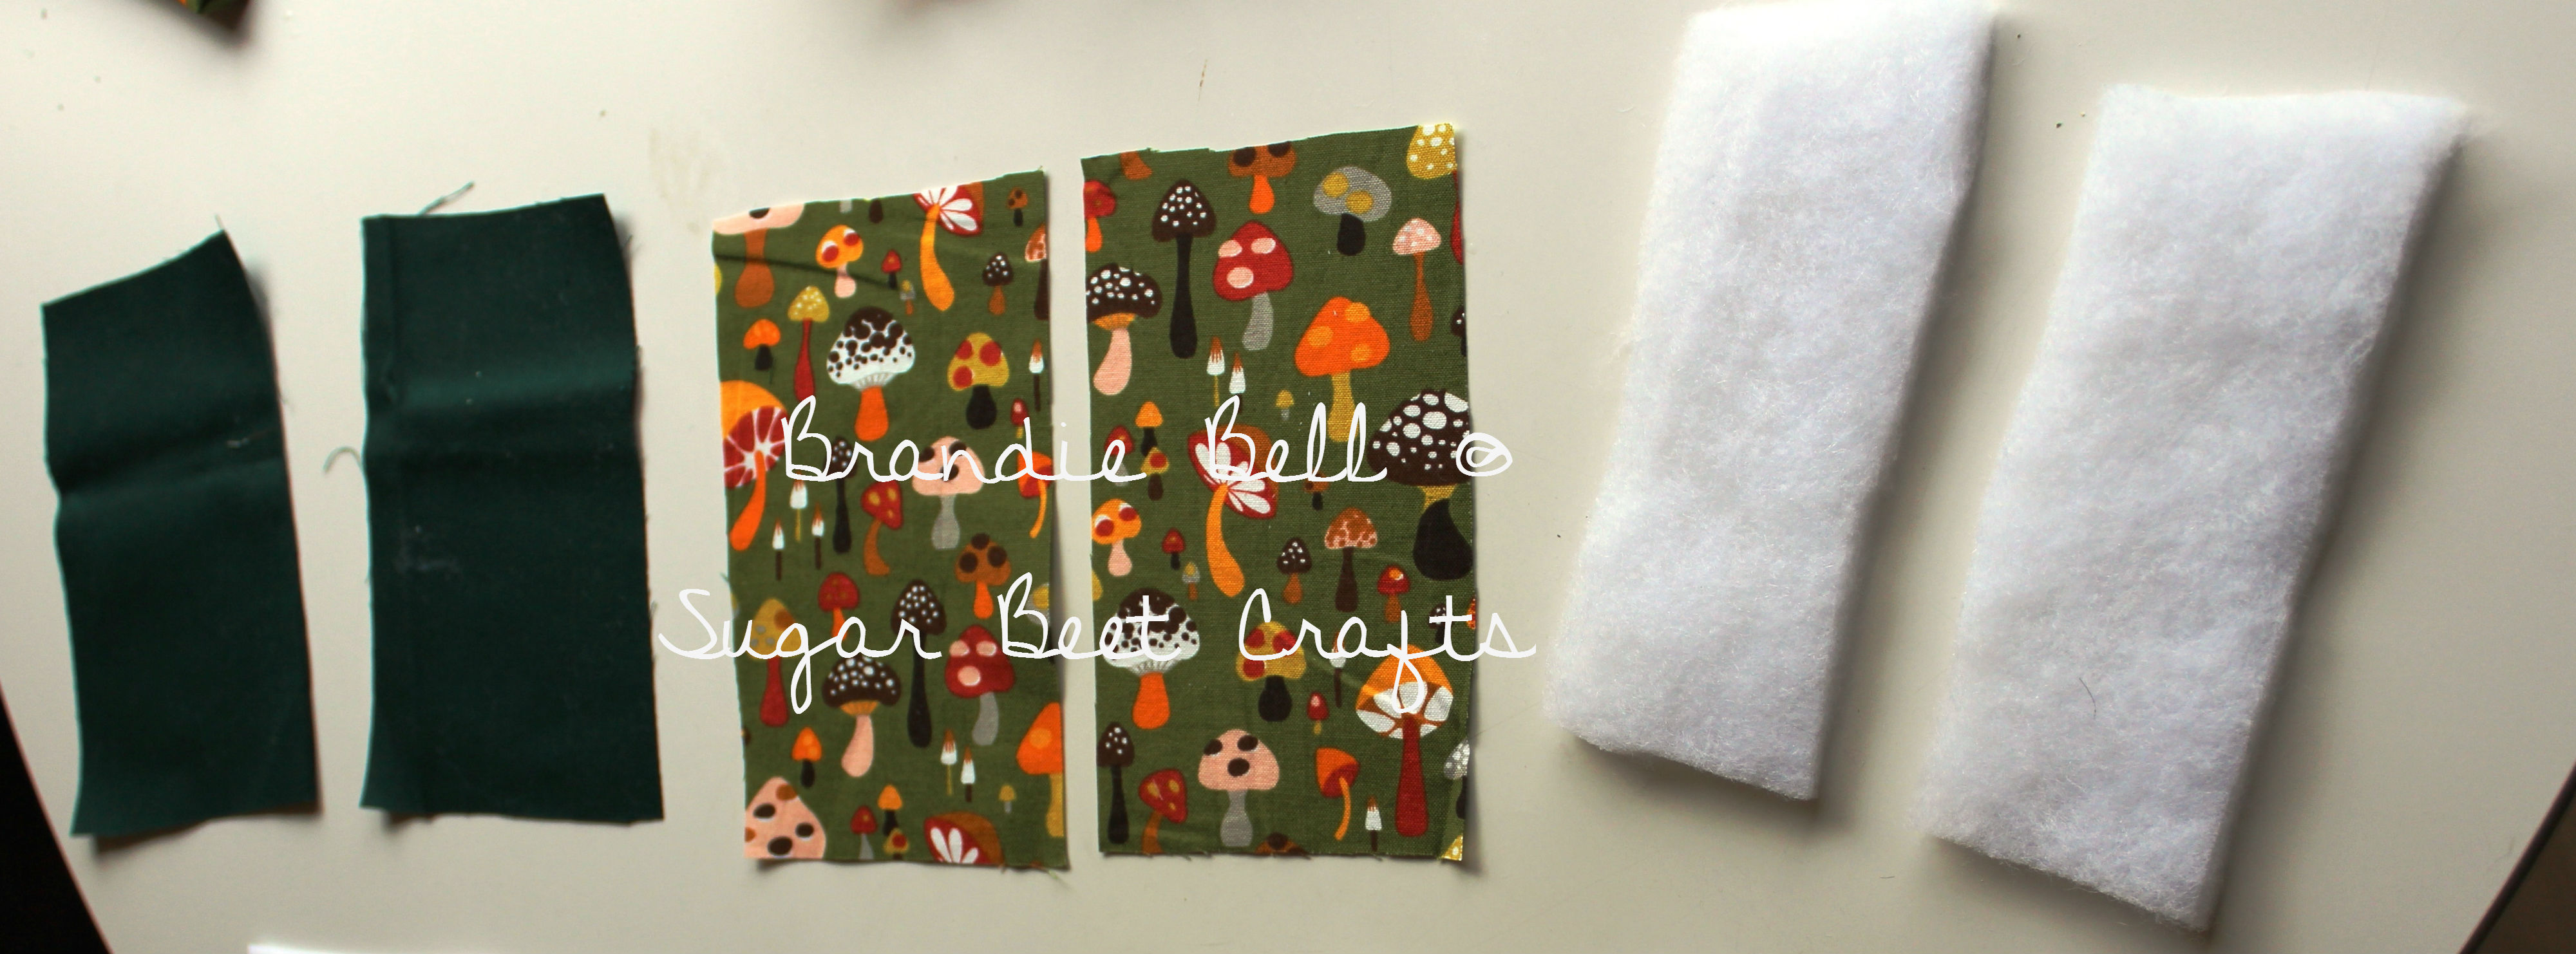
Step 4: Cut your material. I made the fabric rectangles bigger than my template so that I can trace the template onto the material and use that as a sew line.

cut out your fabric
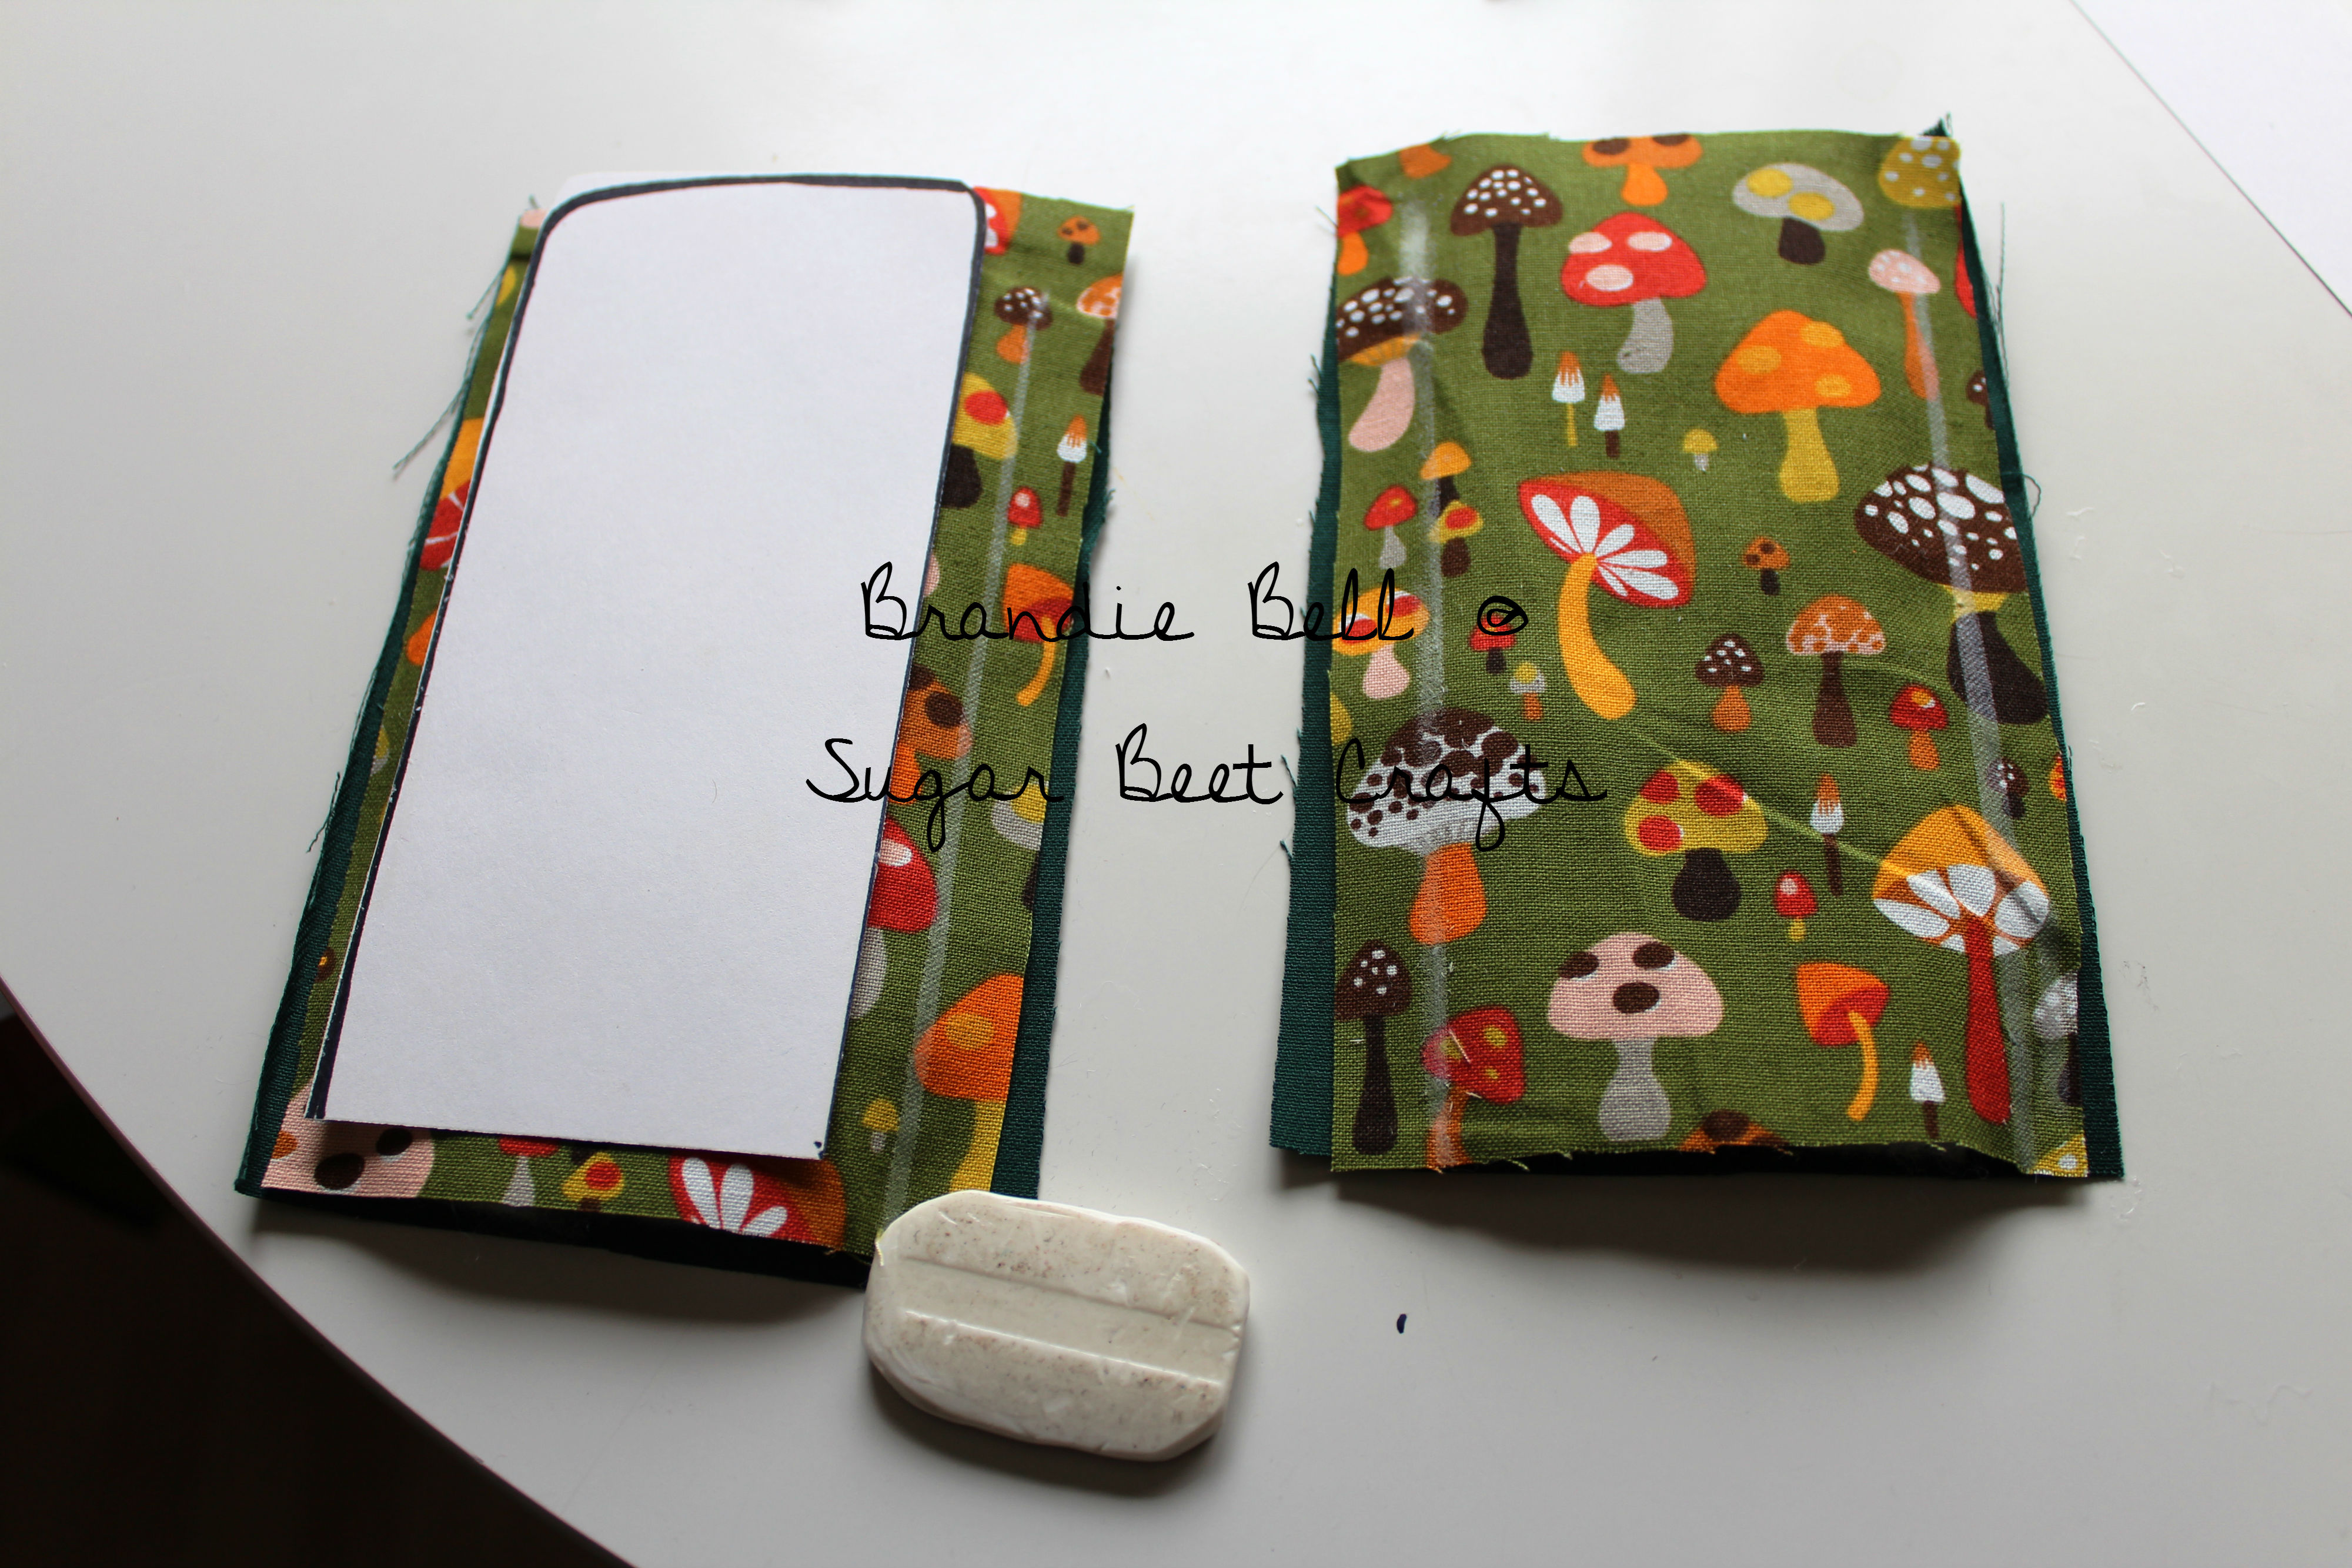
Step 5: Next place your fabrics together, I used a dark green for the inside and the mushroom print for the outside.

put your material together
Your fabric should be right sides out with the polyfill in the middle (put 2 pieces of polyfill in each side, I tried it with just one and it was not quite enough to protect from the heat). You should wind up with two “material sandwiches”.
Step 6: Sew the top three sides of all the layers together using the lines you traced from the template. Then cut off the excess material.

Sew along the template line then cut off the excess
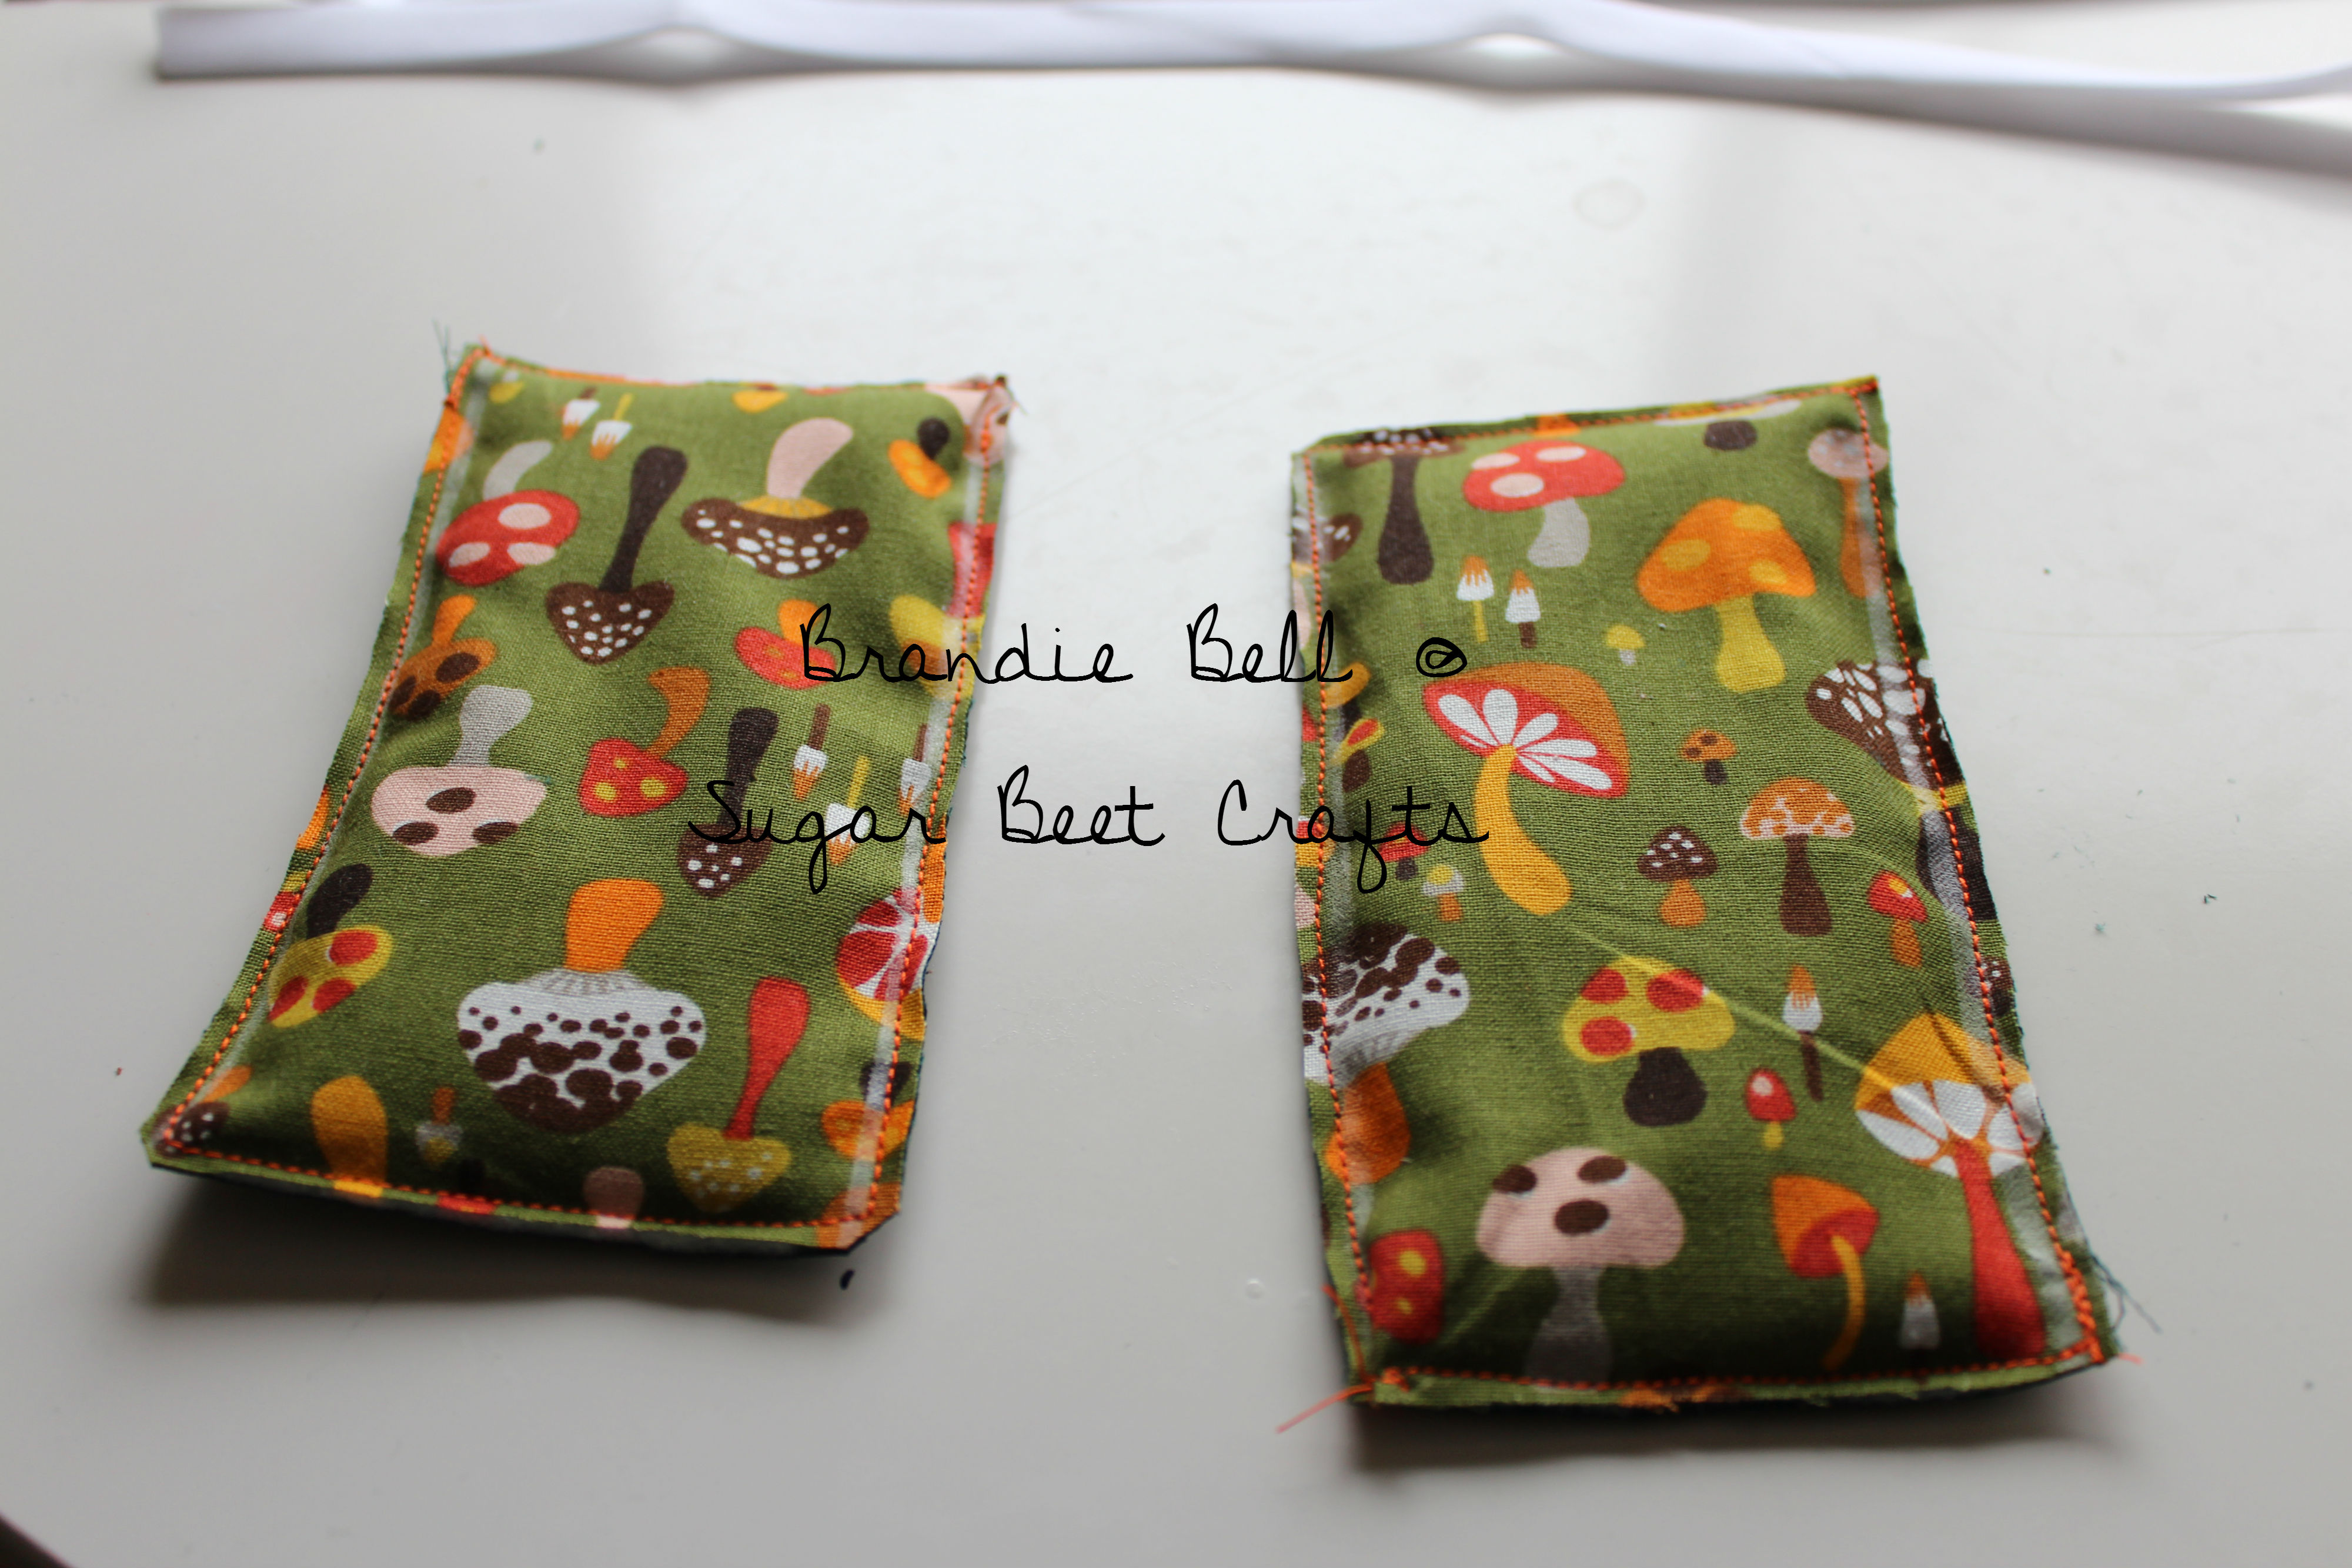
Step 7: You should have two little “pillow”pieces that look like this.

two pillow pieces
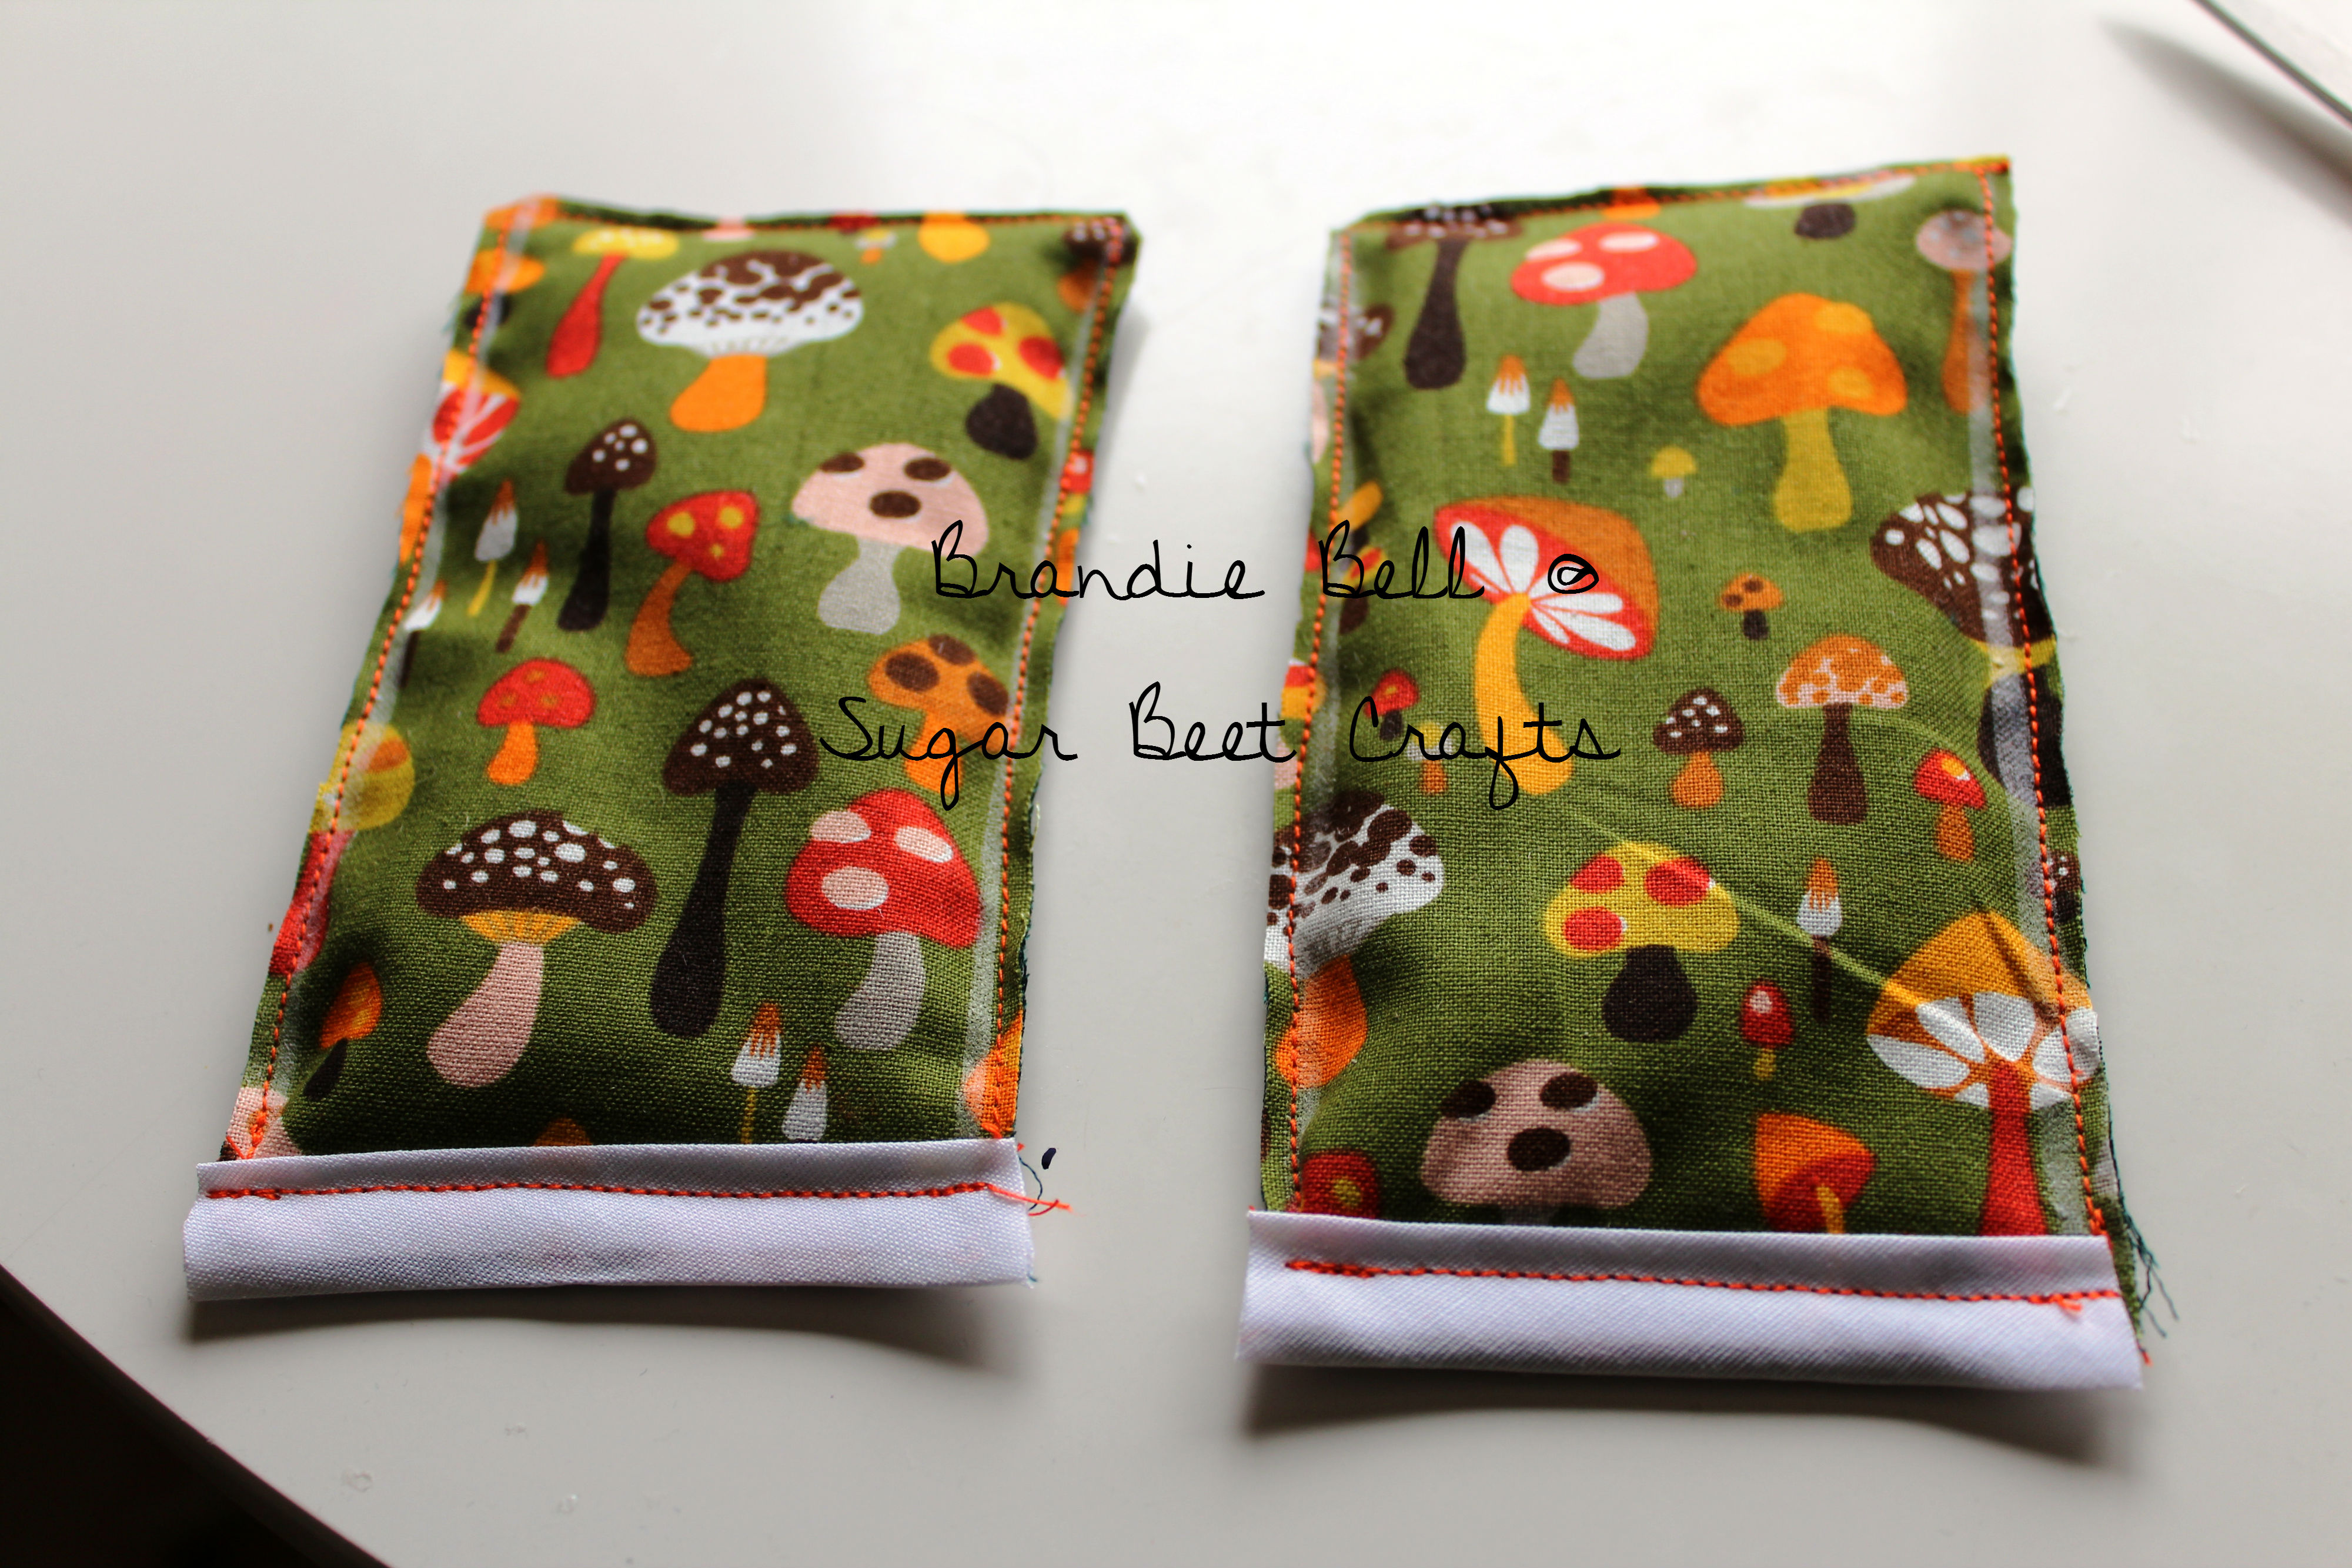
Step 8: Grab your seam binding. Measure out two pieces to fit the bottom of each side. Tuck your material into the binding (make sure both side of the little pillow are covered) then pin. Once pinned sew across the bott

Add seam binding to bottom
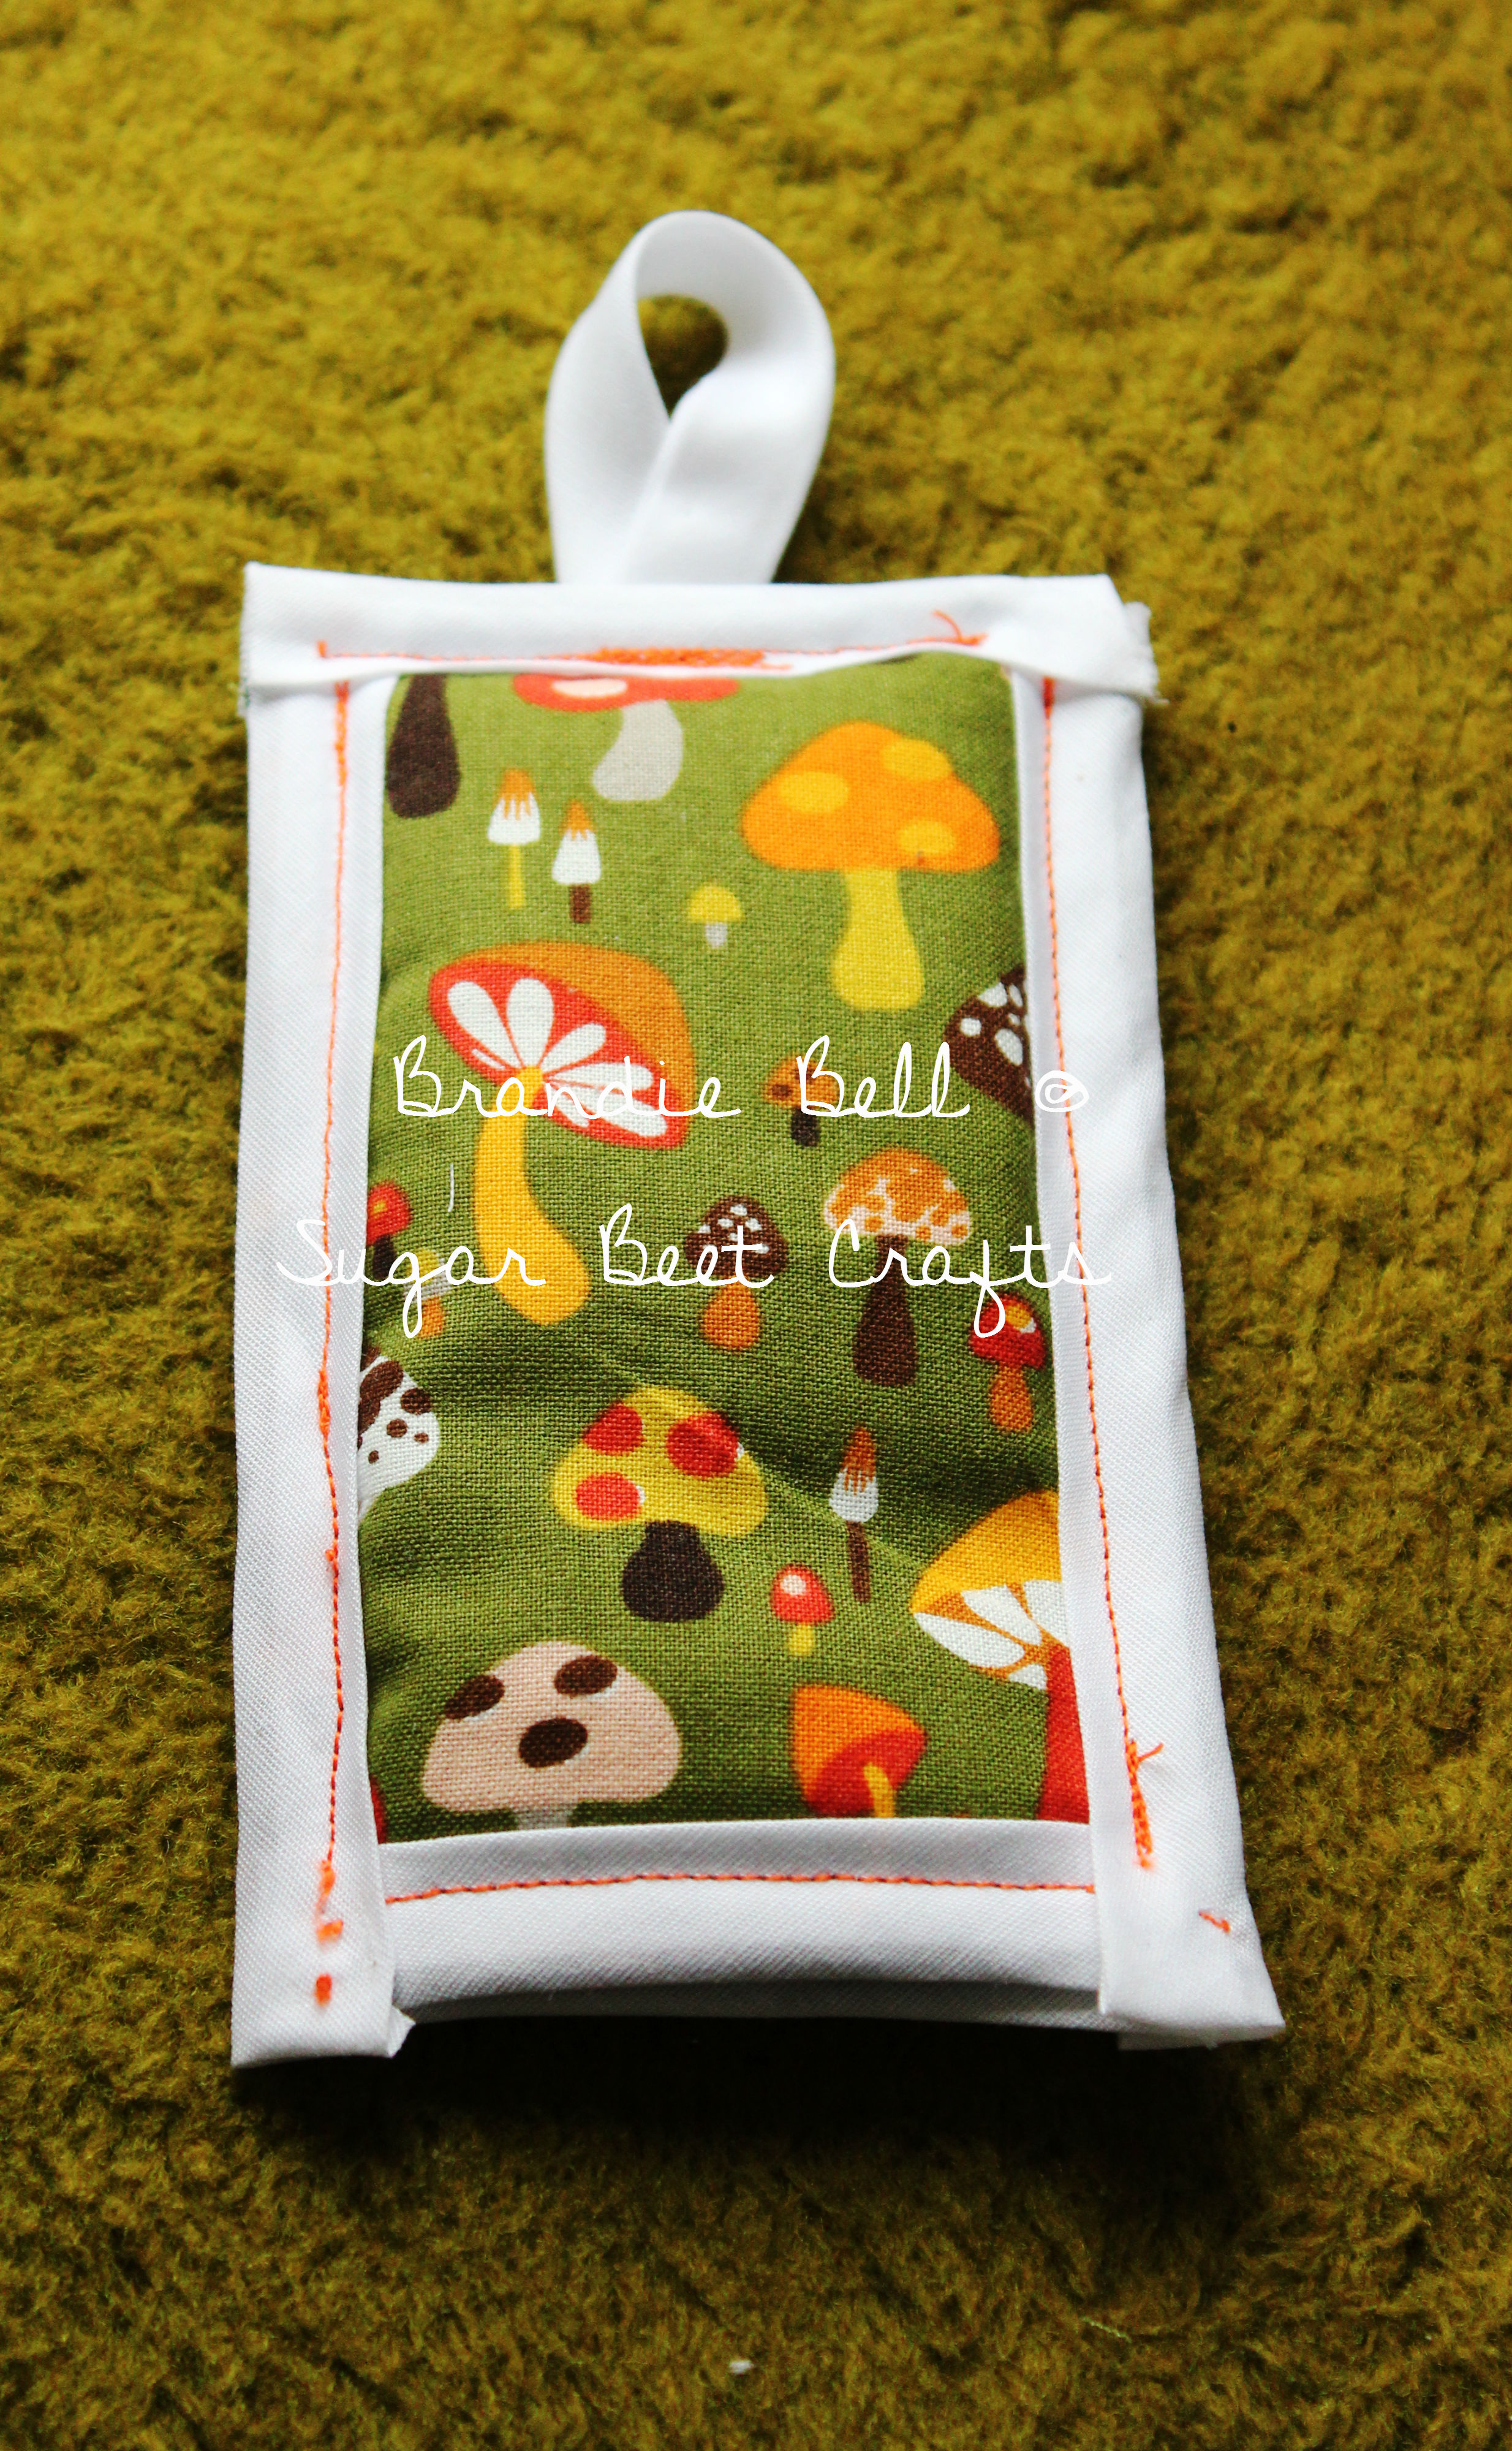
Step 9: Sew some more seam binding around the remaining three sides. Then using a small amount of the seam binding, make a loop. Pin down the loop to the top and sew. *Make sure you tuck the ends of the seam binding under for a neater look.

Pan Handle Cover
Comments:
I am sure there is probably a better way of making these, so if you have any tips or tricks please feel free to comment.
I hope you can use this tutorial in the future. If you do make one, I would love to see them!
Please Share I appreciate it!:


You must be logged in to post a comment.