Adventures of Caterpillar Friend

This is just a fun photo post for anyone that did not see the daily updates of Caterpillar Friend on Twitter or Facebook:

How I met Caterpillar Friend…

So let’s start at the beginning. It all started with the balcony…

1

and my loved tomato plant that I grew from a rotten tomato.

2

The tomato plant grew to almost 6 feet tall! It was full of tomatoes and lots of pretty green leaves. One morning I went out to water the tomato plant and noticed half the leaves were gone, and the other half were all chewed up. So I explored and explored.

Then I found them, little caterpillars all over the plant!

I refuse to use pesticides or anything like that, so I just sat there picking them off for relocation to the park across the street.

But…I kept one…for the love of science, in a very cozy jar πŸ˜€

3

(No caterpillars were harmed during the making of this post!)

4

day 2

6

7

8

9

10

11

12

13

He didnt want to go at first but once he realized he could fly I let him go.

I love science! Do you?

Halloween Tutu Garland Tutorial!

Title Page Halloween Garland 2

Hi Everyone!

It’s Halloween time!! One of my favorite times to decorate.

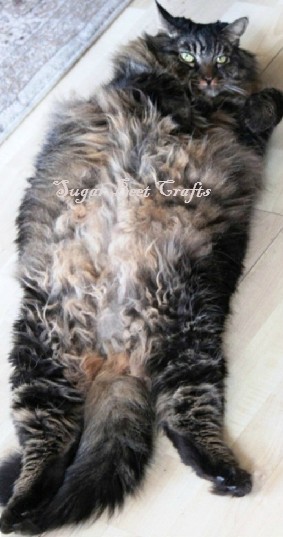
This year, to pretty-up our fireplace I decided to make it wear a tutu!! The fireplace can’t complain like the cat does when I dress it up.

All the supplies I had laying around the house to keep costs down and reuse things I would normally throw away. I had 4 panels of sheer purple curtains from my living alone days and a bunch of black tulle that I have been keeping all these years waiting to be something.

Put them together and you have…

drum roll please πŸ˜€

1

WooHooo Garland!

Halloween Fireplace Tutu Garland!

So here is what you need:

1. Twine, string, yarn or thin rope
2. Fabric (I used a sheer purple curtain and some black tulle)
3. Scissors

Step One: Prepare your fabric by cutting itΒ into strips. To achieve the ripped effect, I cut a notch in the top of the fabric, then tore it the rest of the way. Just make sure you are tearing with the fabric, it should tear straight all the way down. If you go against the fabric it will not tear.

I made my strips different widths but stayed around one inch. The length depends on the look you are going for, I made mine approximately eight inches so they were about four inches long in the end.

2
Step Two: Measure the length of your fireplace mantle, depending on what you use, you may want to double it. I used twine, so I decided to double it, then tied it off. It was now a big loop.

3
Step Three: Lay out your twine.

Step Four: Start with one fabric strip. Fold it in half, and lay it under the rope with the loop above the rope line.

4

Step Five: Grab the two end pieces of the fabric, fold it over the twineΒ and back through the loop.

5
Step Six: Pull the two end pieces tight.

6
Step Seven: Pull down and adjust.

7

Step Eight: Repeat, alternating strips if your using different colors.

It should start to look like this:

9

keepΒ going

8
andΒ going until you have the length you want and hang.

10

I would tell you to resist the urge to wear it like a tutu and dance around to β€œThis is Halloween” from the Nightmare Before Christmas…but that would be no fun and I would be a hypocrite! πŸ˜€

I love the way it turned out. It does take a bit of patience depending on how long you’re making it.

This one wound up 48 inches long and it took me about 4 episodes of Game of Thrones but I kept getting up and taking breaks.

AΒ great distraction for kids, just plop them down in front of the tv with a bunch of cut up strips and they will probably get one made up in no time.

11

Have you started decorating yet?
What is your favorite decoration?

Downloadable Halloween Tags Available at Etsy

HI Everybody!

Warning: shameless self promotion post πŸ˜€

Just a quick FYI, I have created some fun downloadable tagΒ setsΒ for halloween, they are great for Tags, Cards, Flags or Bookmarks! Check them out on Etsy!

Check them out here:Β https://www.etsy.com/shop/SugarBeetCrafts?ref=hdr_shop_menu

Halloween Tag Set 1 Preview Halloween Tag Set 2 preivew Halloween Tag Set 3 Preview

Also Available for Halloween the Bat Makeup and Pencil Bag:

ScreenHunter_344 Sep. 25 13.38

Have a wonderful week!!!

Thanks for putting up with my shameless self promotion! πŸ˜€

UpCycling an Old Frame into a Kitchen Reminder Board

Title

Hi Everyone! Hope you are all having a great week so far.

Todays project is up-cycling an old picture frame into a Kitchen Reminder Board.

I was totally going to throw the frame away because I am borderline craft hoarder and finally talked myself into throwing something away (which is really hard for me lol), but then my boyfriend said “You’re not going to turn that into something?” ….Yes, Yes I am.. and boy am I glad I did!

I wanted something in the kitchen to just quickly jot down stuff as we ran out. I tried pen and paper but then I would lose the list then find it 3 months later behind the refrigerator. You know how it goes. πŸ™‚

I think the frame is much happier in its new frock…and out of the landfill.

So here we go:

Materials Needed:

ο‚· Old Frame
ο‚· Acrylic Gesso
ο‚· Mod Podge
ο‚· Paper or Fabric
ο‚· Blank Background page
ο‚· White Erase Pen

Instructions:

1. Clean off your old Frame.

Old frame in need of some TLC.

Old frame in need of some TLC.

2. Cover your frame with gesso. Let Dry.

Frame 2 Frame 3

3. While waiting for the gesso to completely dry, cut out your pieces of fabric or whatever you choose to cover the frame with.

Originally, I was going to use cut out flowers from magazines, and just add small pieces of scrap fabric. But as you can see, I fell in love with the fabric and decided to use that instead. It goes more with the vintage vibe of our kitchen.

Cut out your pieces

Cut out your pieces

4. After the frame is completely dry. Add each piece of fabric or paper by applying Gesso to frame, adding fabricΒ then apply Gesso to the top.

Frame 5
4. Repeat until it’s covered. Make sure each piece is covered with the Gesso as a sealer.

Coat and Let completely dry

Coat and Let completely dry

5. Let it dry.

6. Add blank paper to the frame as a back ground.

Frame 7

7. Add aΒ Dry Erase pen.

Frame 8

8. Ready to use!

Frame 9

Fun Free Download – Keys

ScreenHunter_249 Aug. 07 10.08

Why hello there! I hope you’re doing fantastic! Β 

I was clearing out some of my crafting things when I came across a bunch of random keys. I collect them to use for projects and stuff. Well, I thought it would be neat to scan them in to use in digital art or whatever. Β 

I have uploaded two different formats – well I hope. Β The jpeg is supposed to have a white background the PNG is supposed to be a transparent background.

Feel free to download and play around with them. I thought they were cool so maybe you might too.

If you want to play around with they keys, and do not have Photoshop, there is a program to experiment with.

There is aΒ really neat program that is very close to Photoshop called Pixlr Editor: http://pixlr.com/editor/Β . Β It’s a web based program so you do not have to download anything and it is so much fun. I hope this helps.

Have fun!

Non-transparent:Β 

Download link here:Β https://drive.google.com/file/d/0B2RgcaLznBAhamFnVE8zVGFPbHM/edit?usp=sharing

Transparent:

Download link here:Β Β https://drive.google.com/file/d/0B2RgcaLznBAhdGpLa1Mxei10ams/edit?usp=sharing

Little Bottle of Luck by SugarBeetCrafts on Etsy

PIctures Jan feb 2014 367

St. Patty’s Day is just around the corner, March 17th to be exact. Oh, the memories of being pinched and chased as a child makes me wish I would have had this necklace back then! It seems no matter how hard I tried, I ALWAYS forgot to wear green. Man, did I always pay for it too. Not only did you get pinched in my school, it led to all kinds of evil shenanigans!

It took 33 years, but I finally found some 4 leaf clovers in the wild, I just had to go to Oklahoma to find them!

I found this cute 4 leaf clover myself, and added it to a small bottle charm with Mod Podge.

Little Bottle of Luck by SugarBeetCrafts on Etsy

Buy Little Bottle of Luck by SugarBeetCrafts on Etsy.

Have you been pinched on St. Patty’s Day?