
Hi Everybody!
I hope this post finds you doing spectacular! My next series of posts are going to be Cereal Box Crafts. They are so great to work with, every house has them and by converting one piece of trash into treasure you are helping this beautiful planet. Besides, art supplies can get pricey, so it is always exciting to find everyday items to reuse.
Last September I did a post on using old paperboard as a mixed media canvas. You can absolutely do this with a cereal box or the technical name “chipboard” boxes that food comes in. Here is a link if you would like to give it a go: Mixed Media Art on PaperBoard.
Today I am going to show you a fun way to customize post cards with a Cereal Box.
Supplies Needed:
- Cereal Box
- Scissors
- Mod Podge
- Gesso
- Ruler
- Markers
- Pencil
- Stickles Glitter Glue
- Glitter
- Blank White paper.
Instructions:
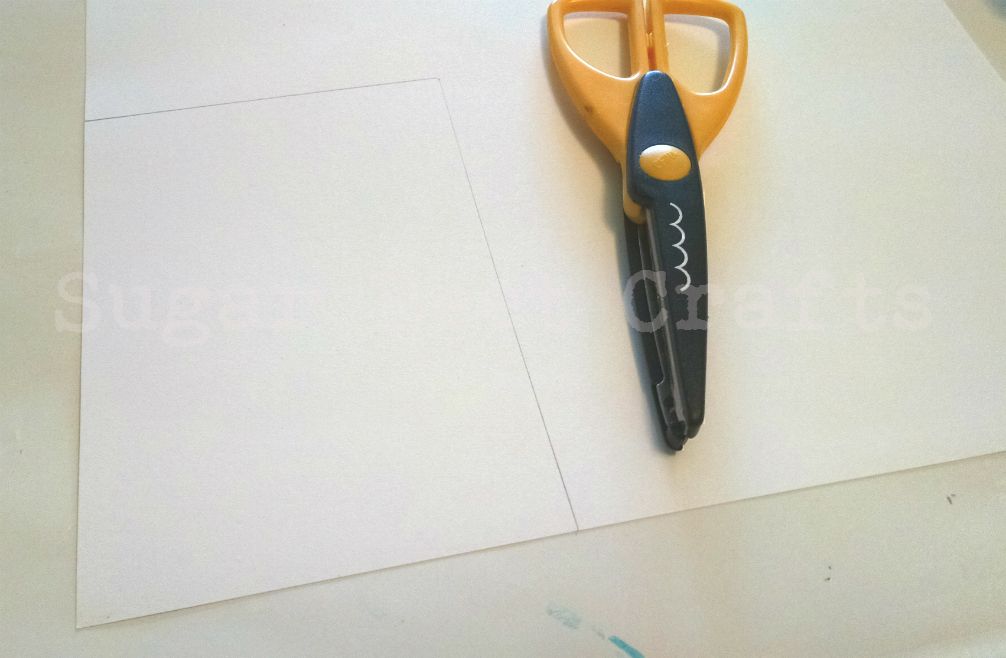
1. Grab your box, scissors and a ruler or an old postcard, and trace the postcard wherever you like on the box. If you do not have a postcard to trace use these dimensions: At least 3-1/2 inches high x 5 inches long.
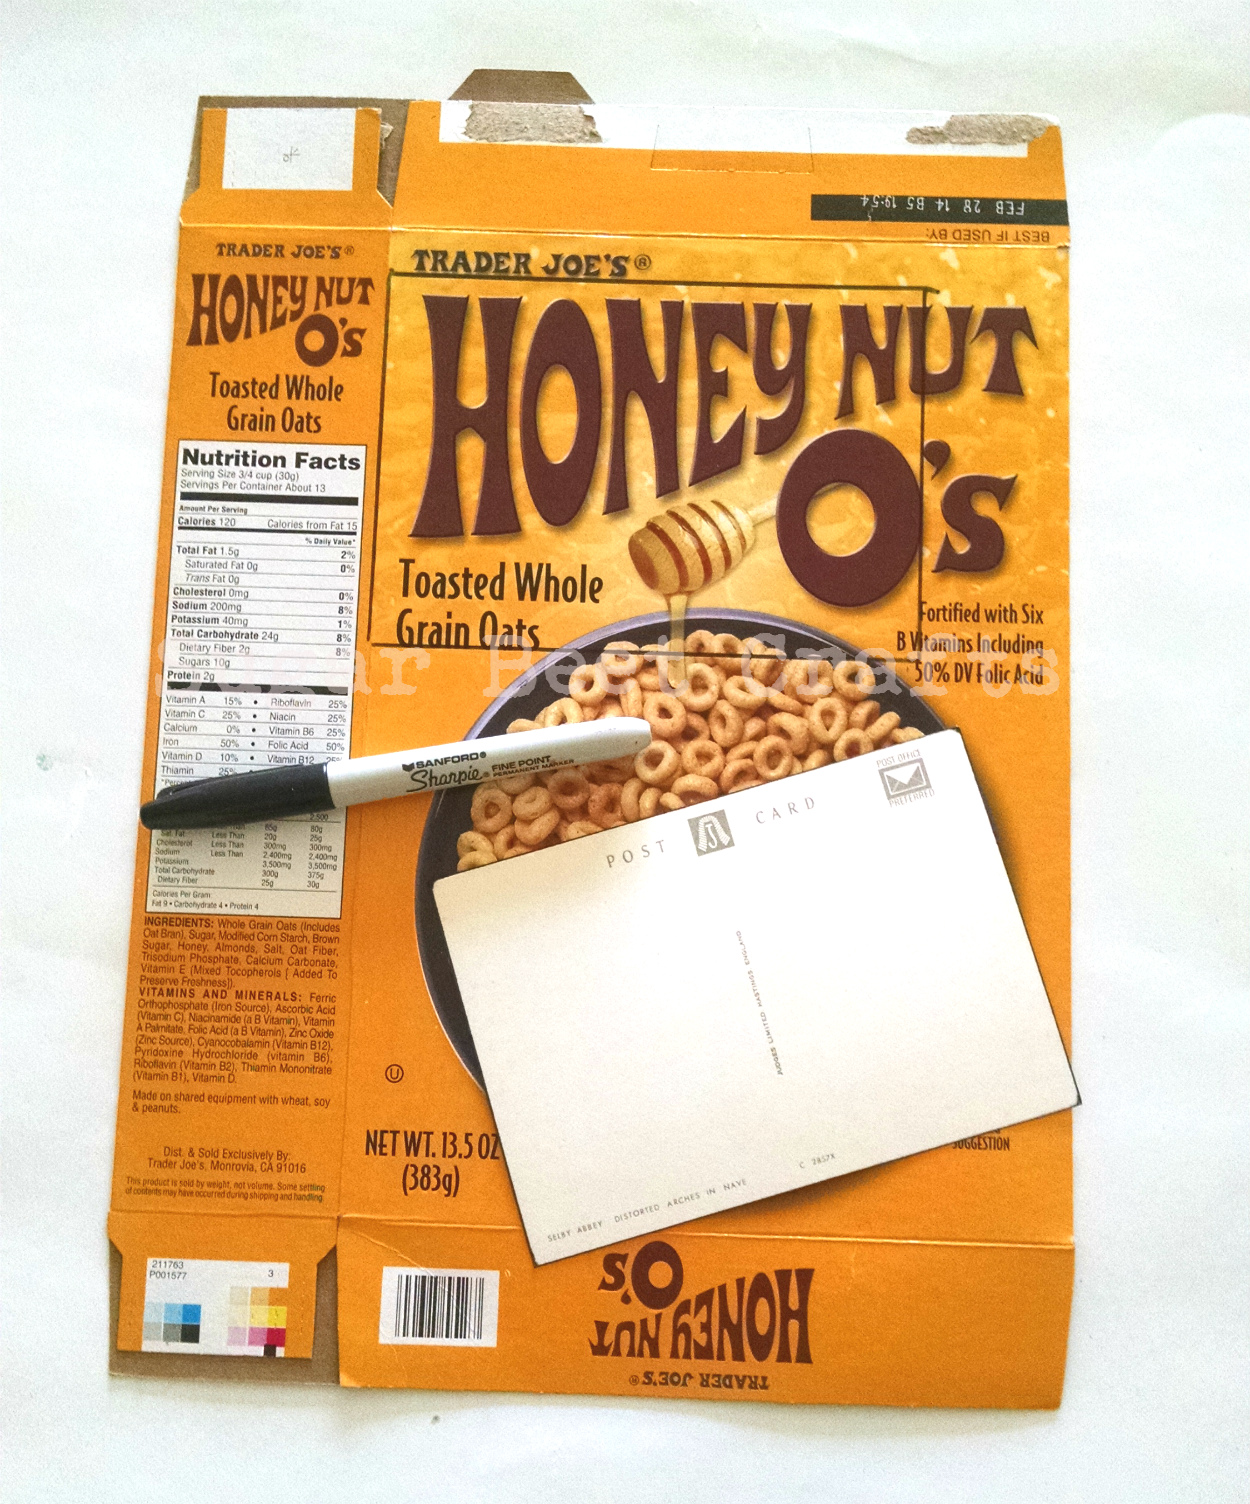
If you do not have a postcard to trace you can use the dimensions. At least 3-1/2 inches high x 5 inches long.
2. Trace and Cut.
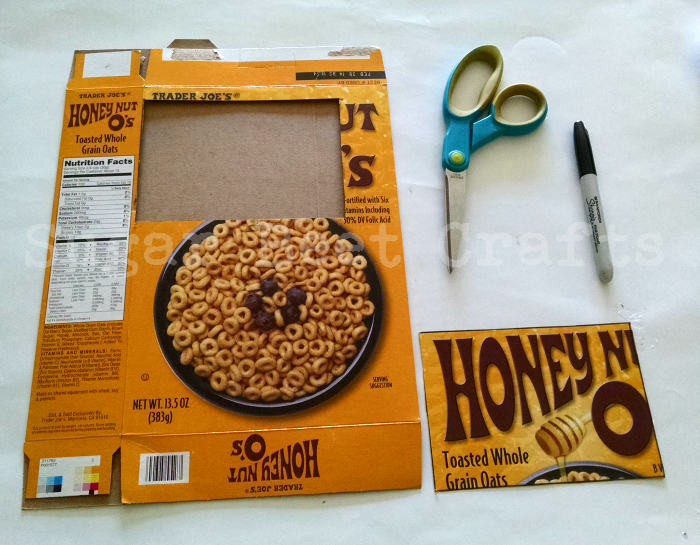
Trace and cut
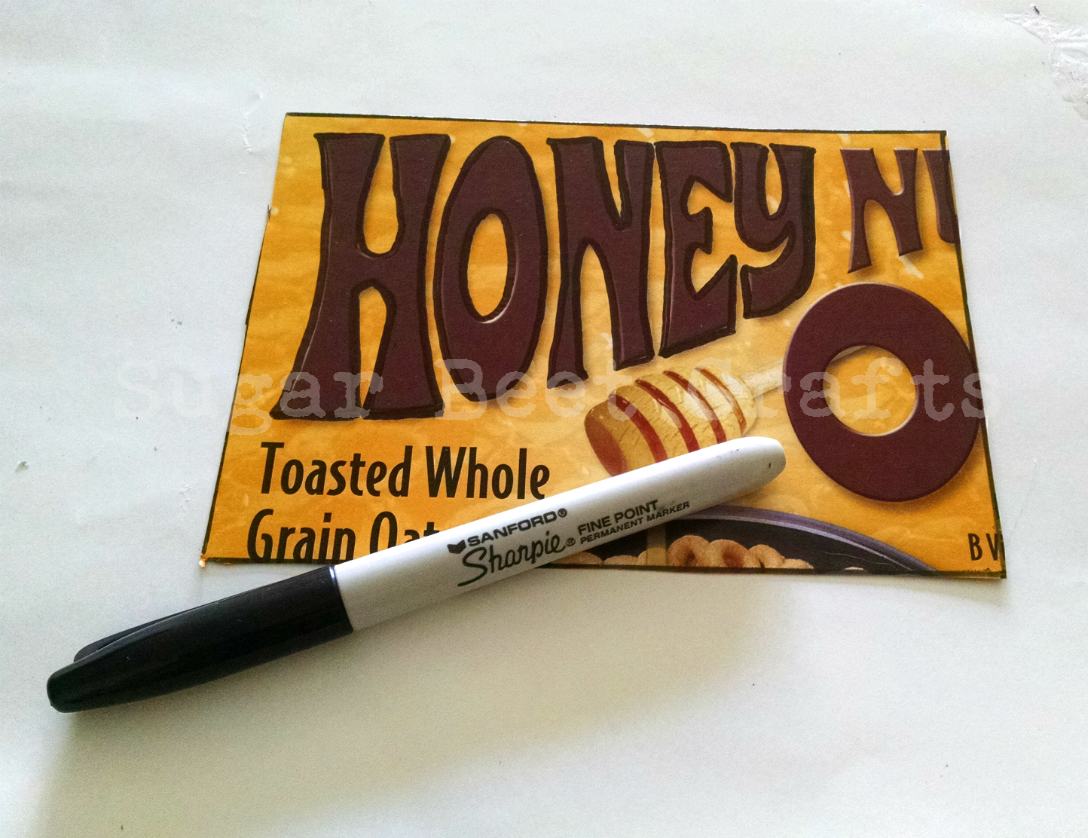
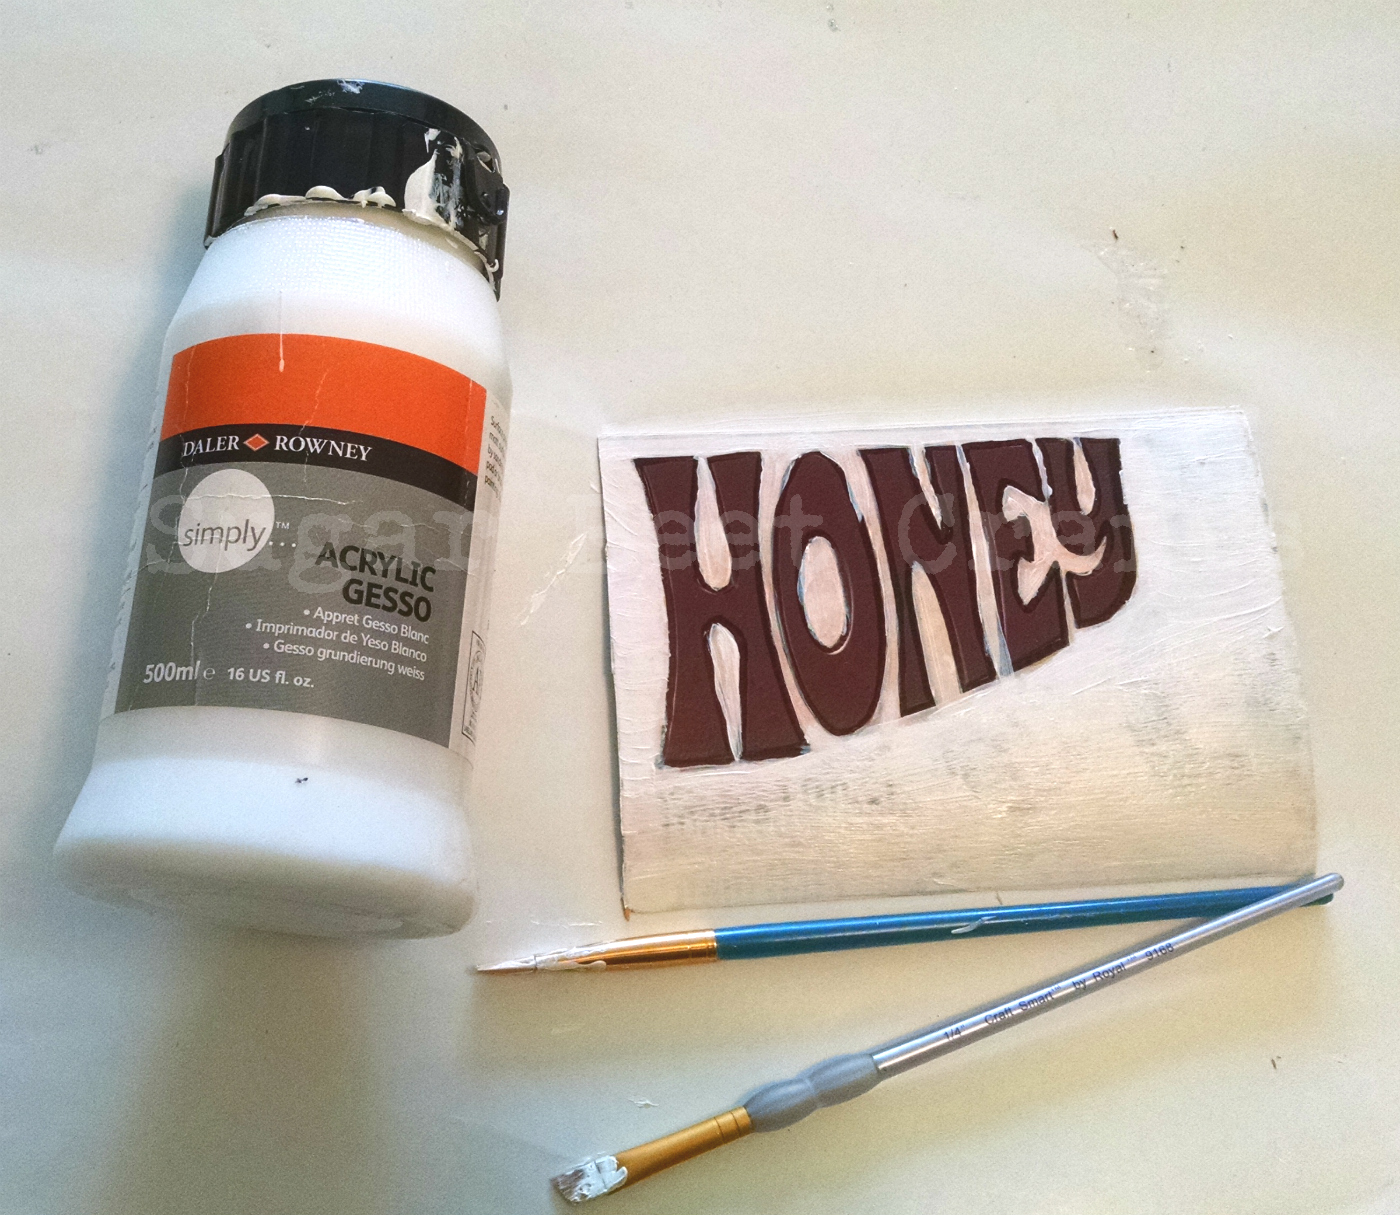
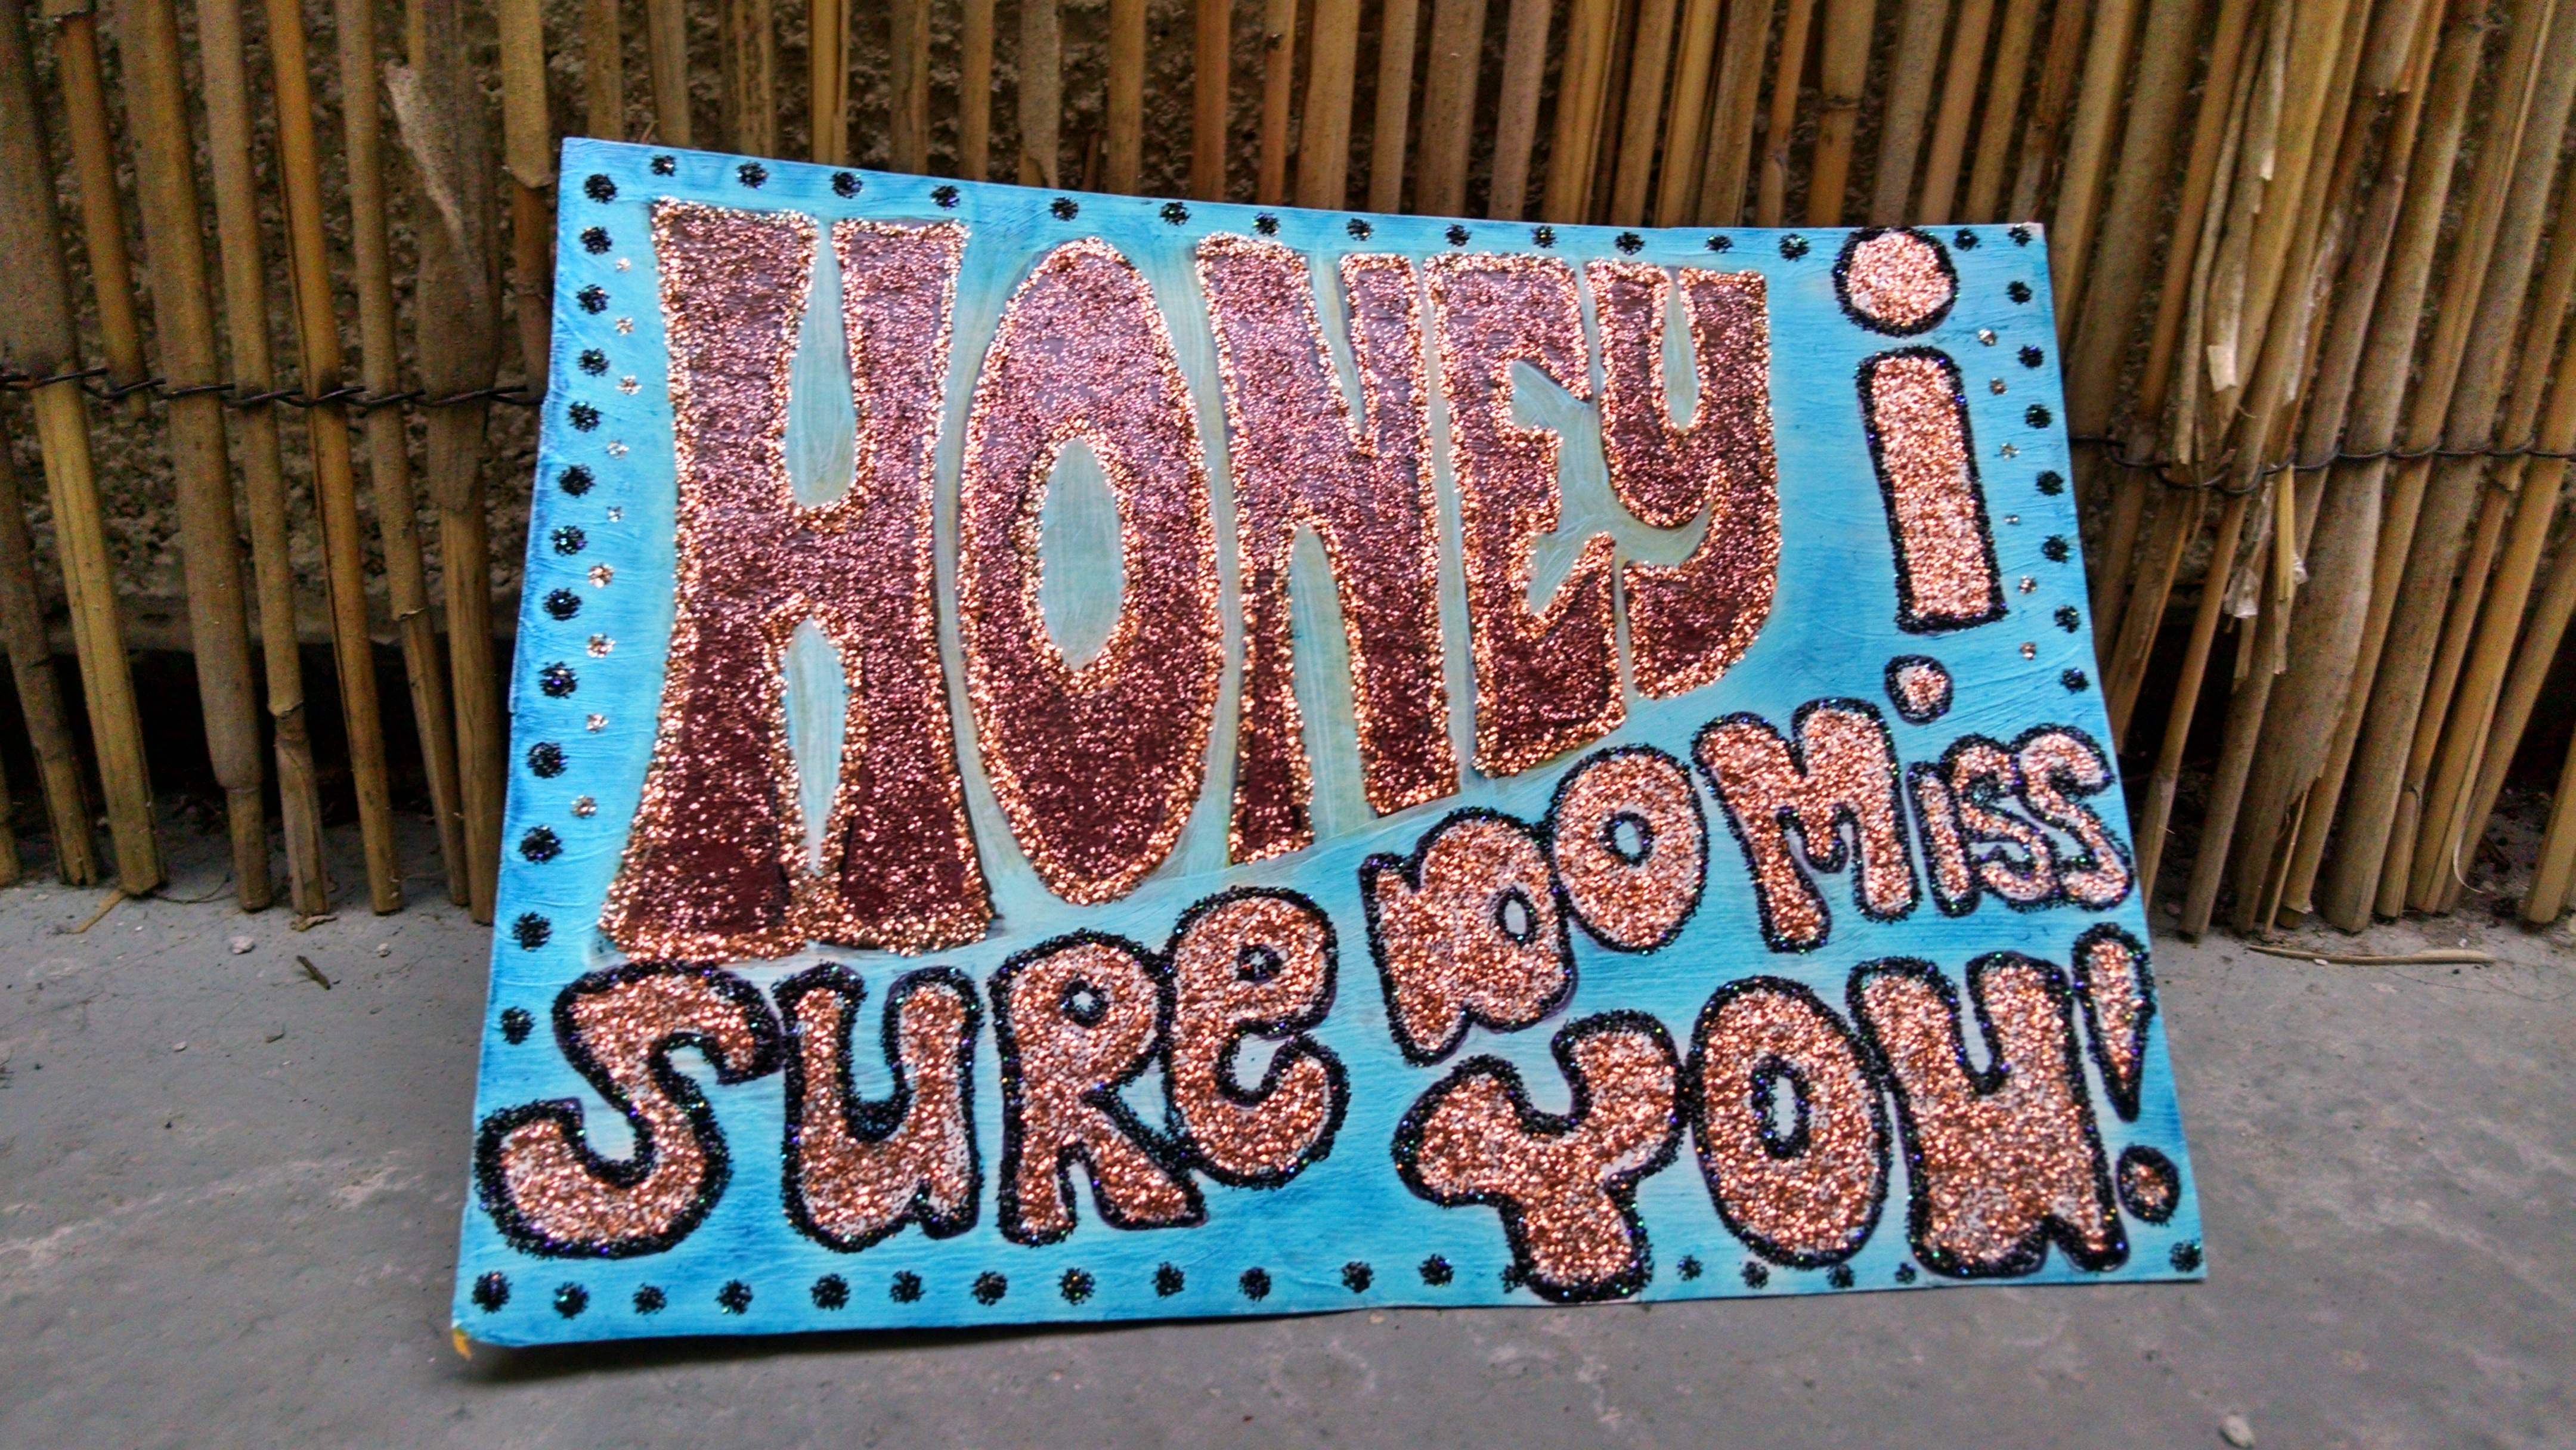
3. I chose to use the word Honey in my postcard. So I outlined the word with thick black sharpie. It gives me an extra thick boarder to work with. This step is optional.
4. Next, Use Acrylic Gesso in white and some fine detailed brushes to paint everywhere but the word Honey.

5. Once the Gesso is completely dry (it may take a few coats), use a pencil to write in your words. I chose: “Honey I sure do miss you”.
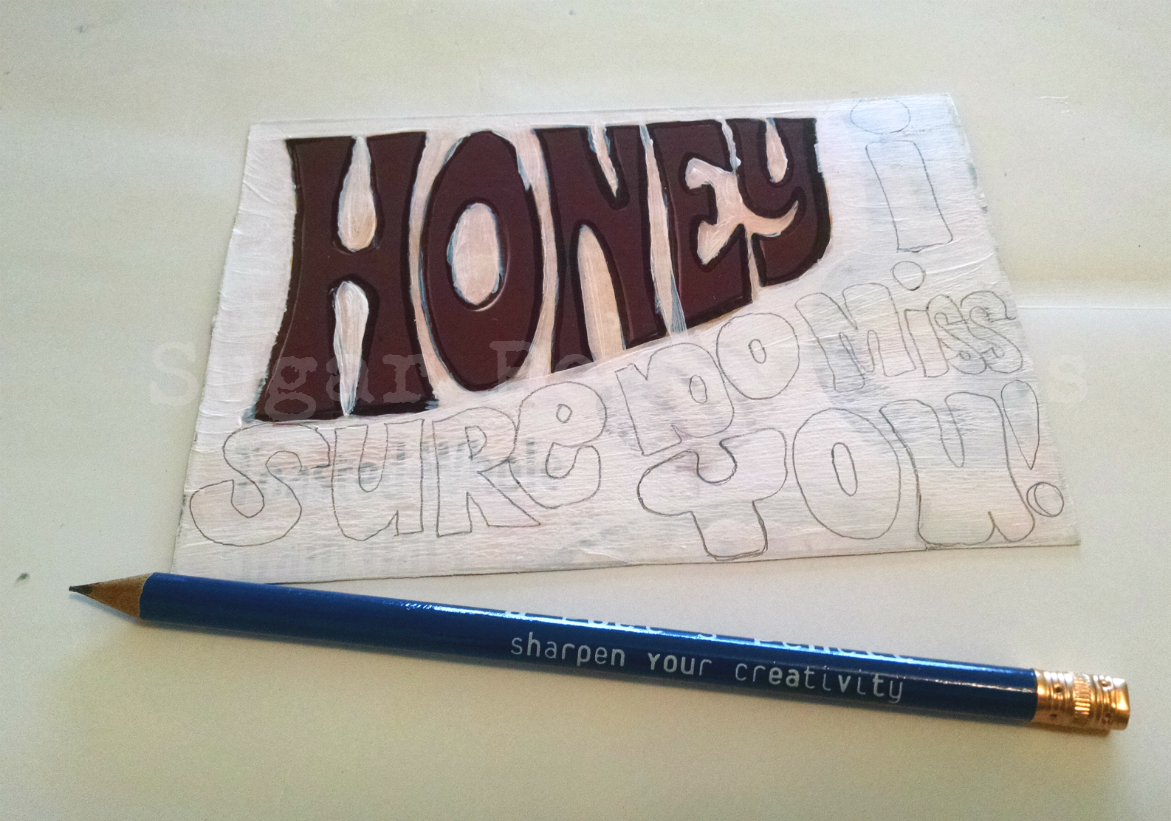
6 Once your completely satisfied with your words, Grab your sharpie and trace. (Just fyi, you can erase on gesso, just be careful and go with the strokes.)
7.) Now Grab your Watercolors and paint all around your words. This takes some fine brushes.

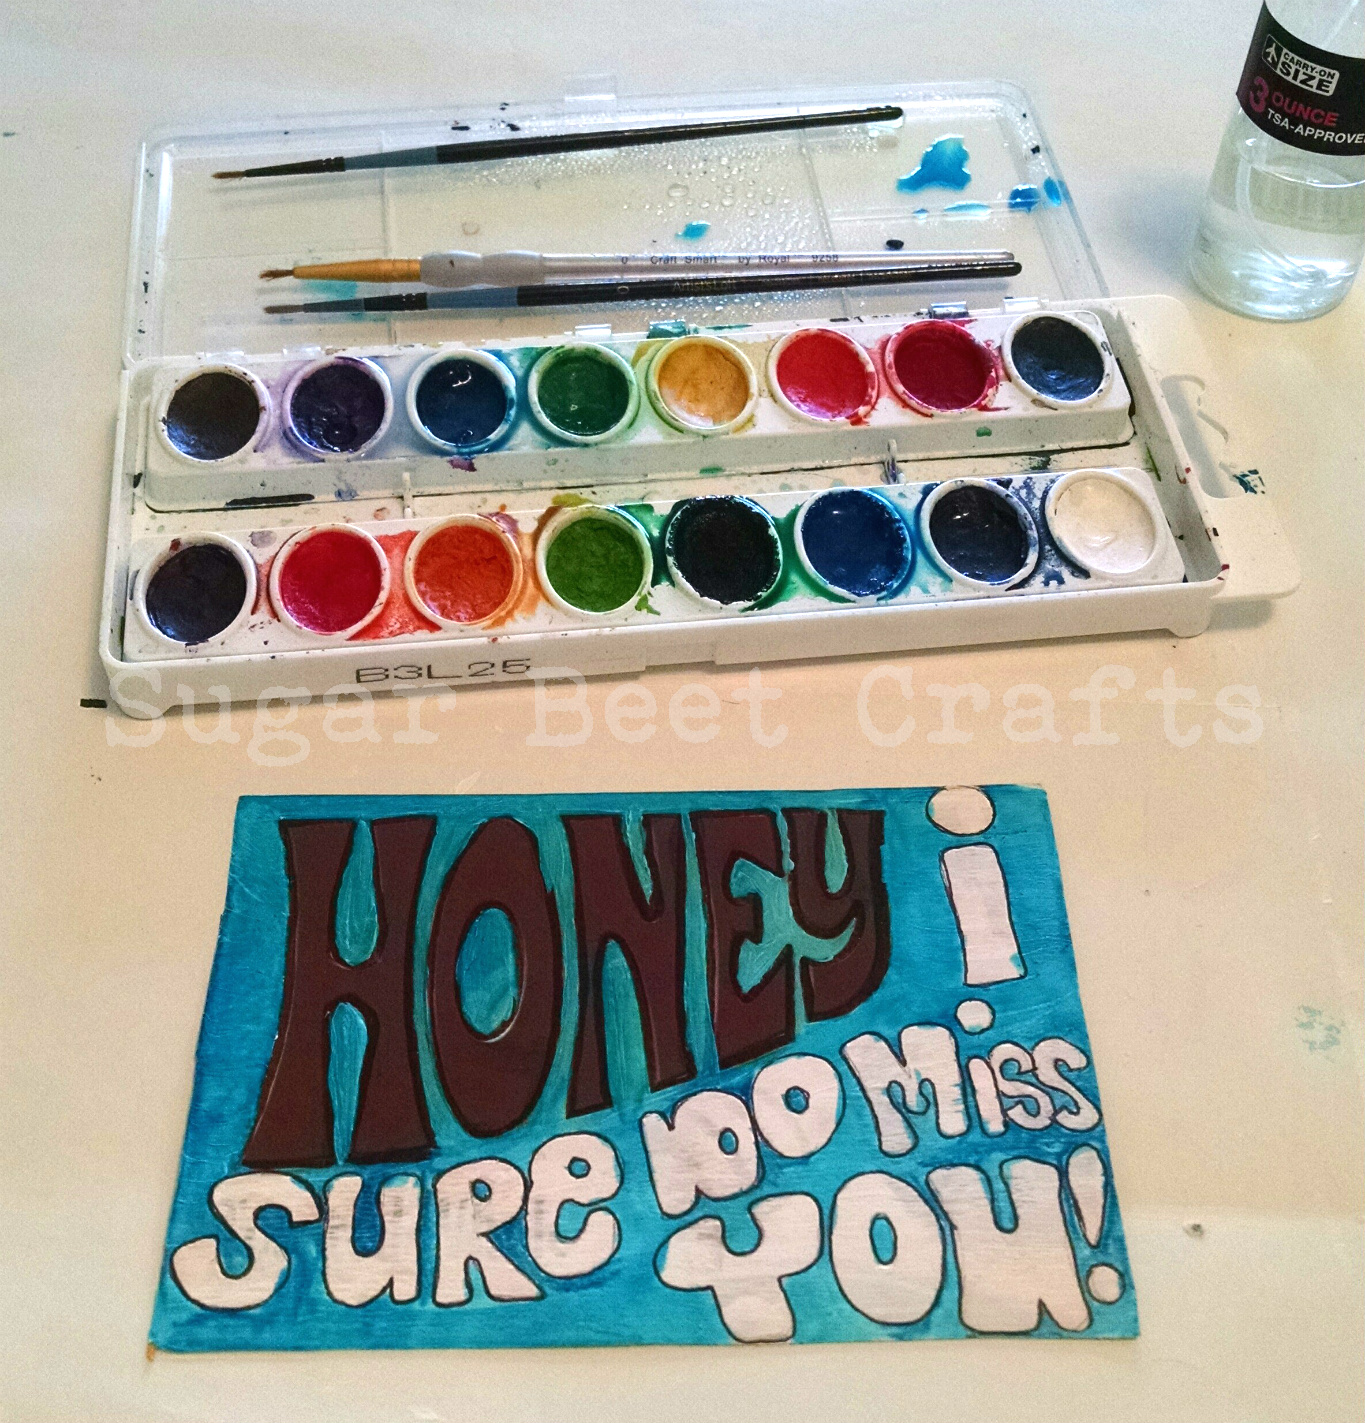
Don’t worry, It does not have to be perfect.
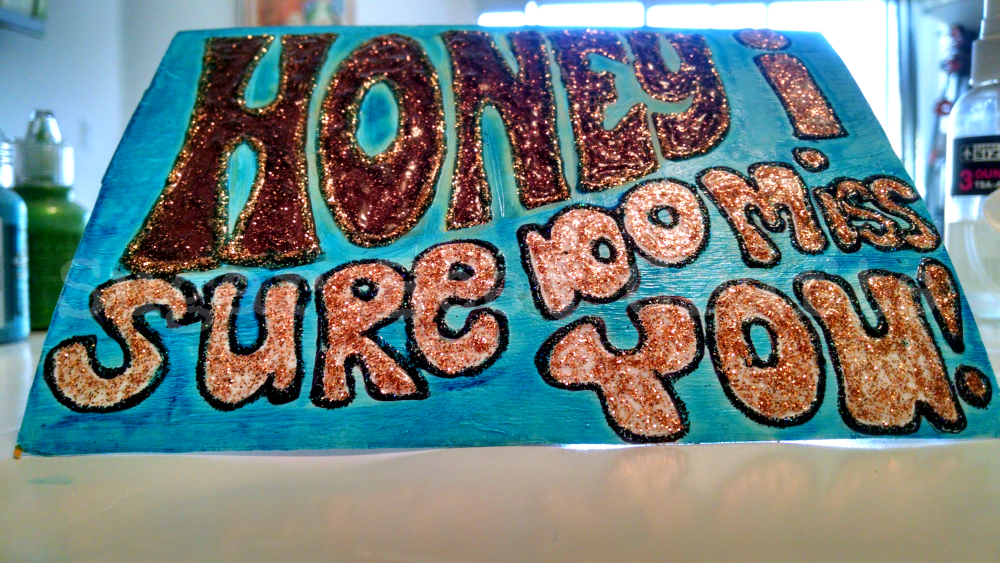
8. Once that is completely dry, Grab your stickles glitter tubes and fill in the words. I outlined my words in a black glitter stickles (not shown), then filled with Gold. The word honey was outlined in gold and filled with a brown. Then added some dots around the sides.

Let Dry
9. While that is drying, Grab your white piece of paper. Trace another post card size rectangle. I then used scalloped edge scissors and chose to make the white paper a tad smaller than the postcard to create a border effect.
10. I added a Post Card Stamp, but you can hand write this or use other stamps.
11. Use Mod Podge to attach once the front is completely dry. 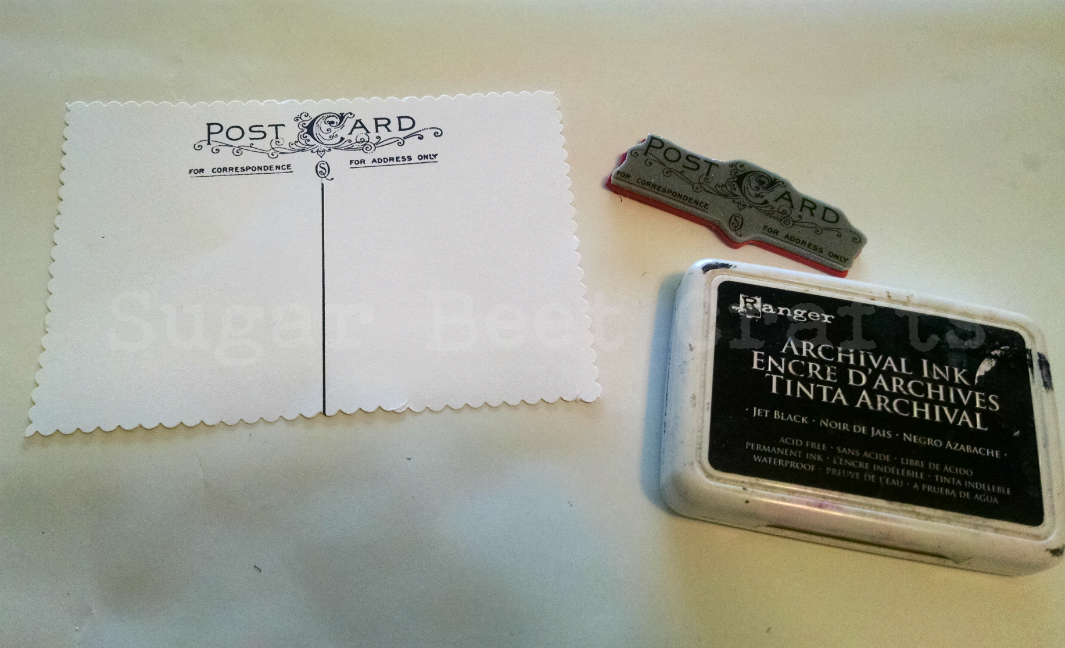
Finished:
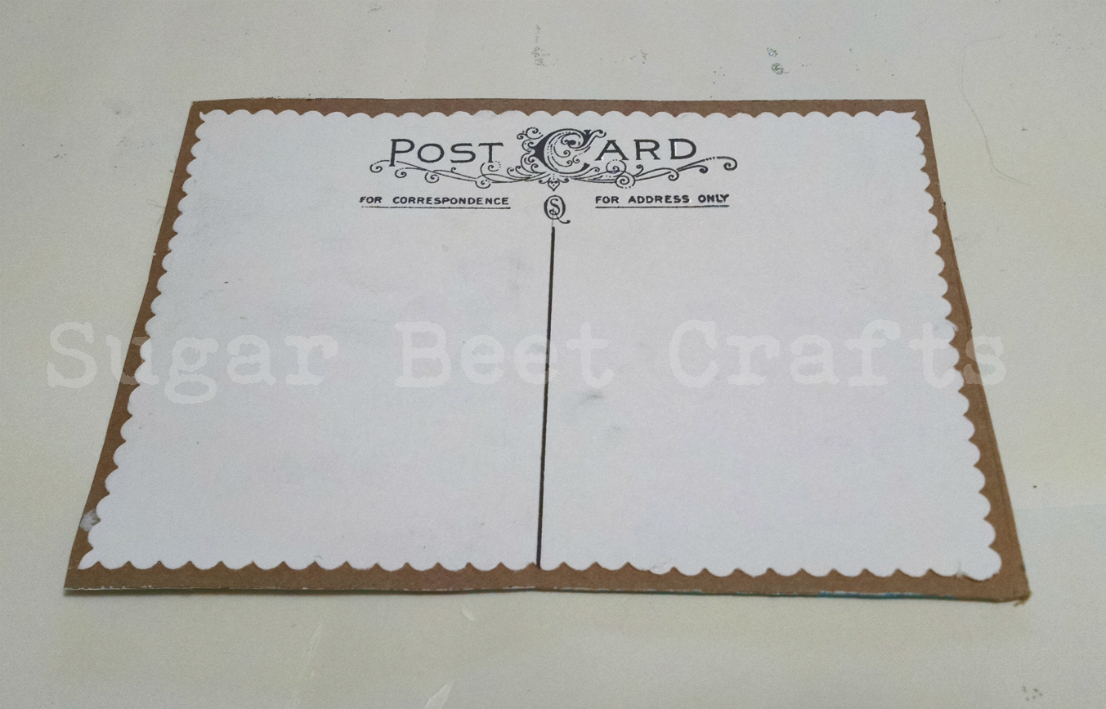
Once it is all completely dry, its a good idea to put a spray sealer on the front side. It will protect the water color and all your hard work!
Also its a good idea, once all dry to stick it in a big book over night so it stays completely flat. Sometimes with all the moisture the paper will want to curl. If you have a tacky surface put the post card in wax paper or freezer paper before you put in the book so they don’t stick.
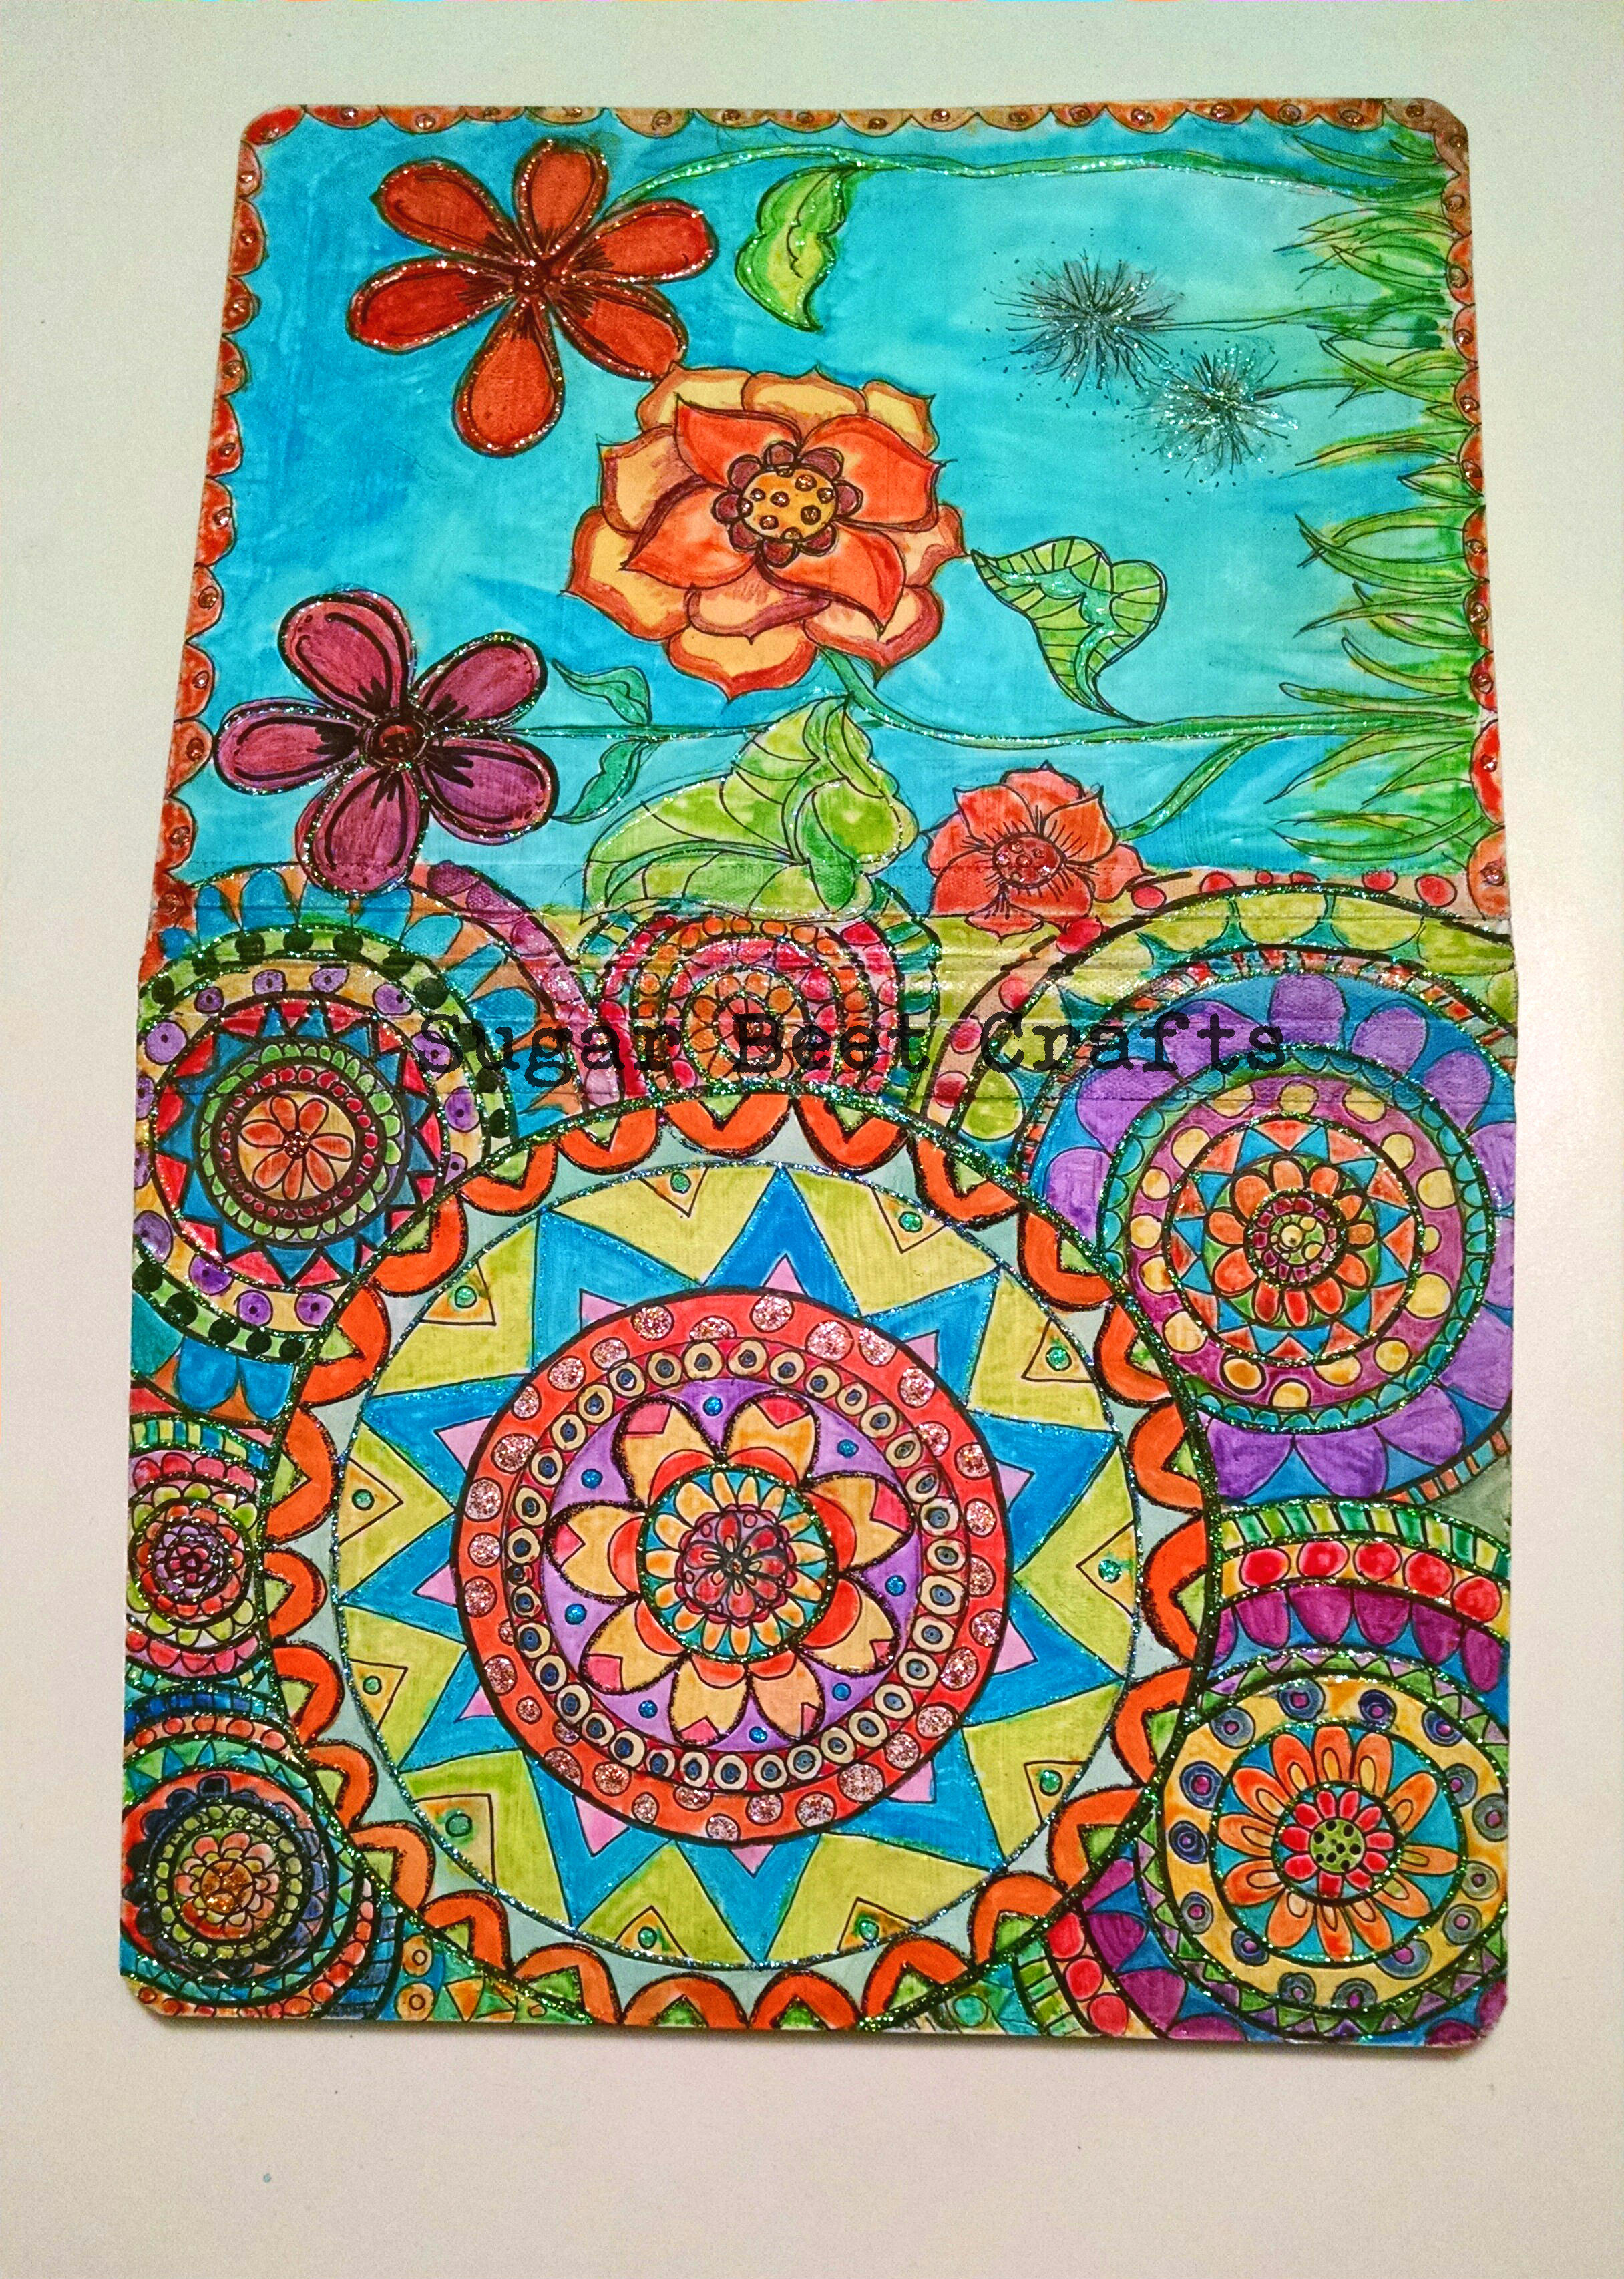
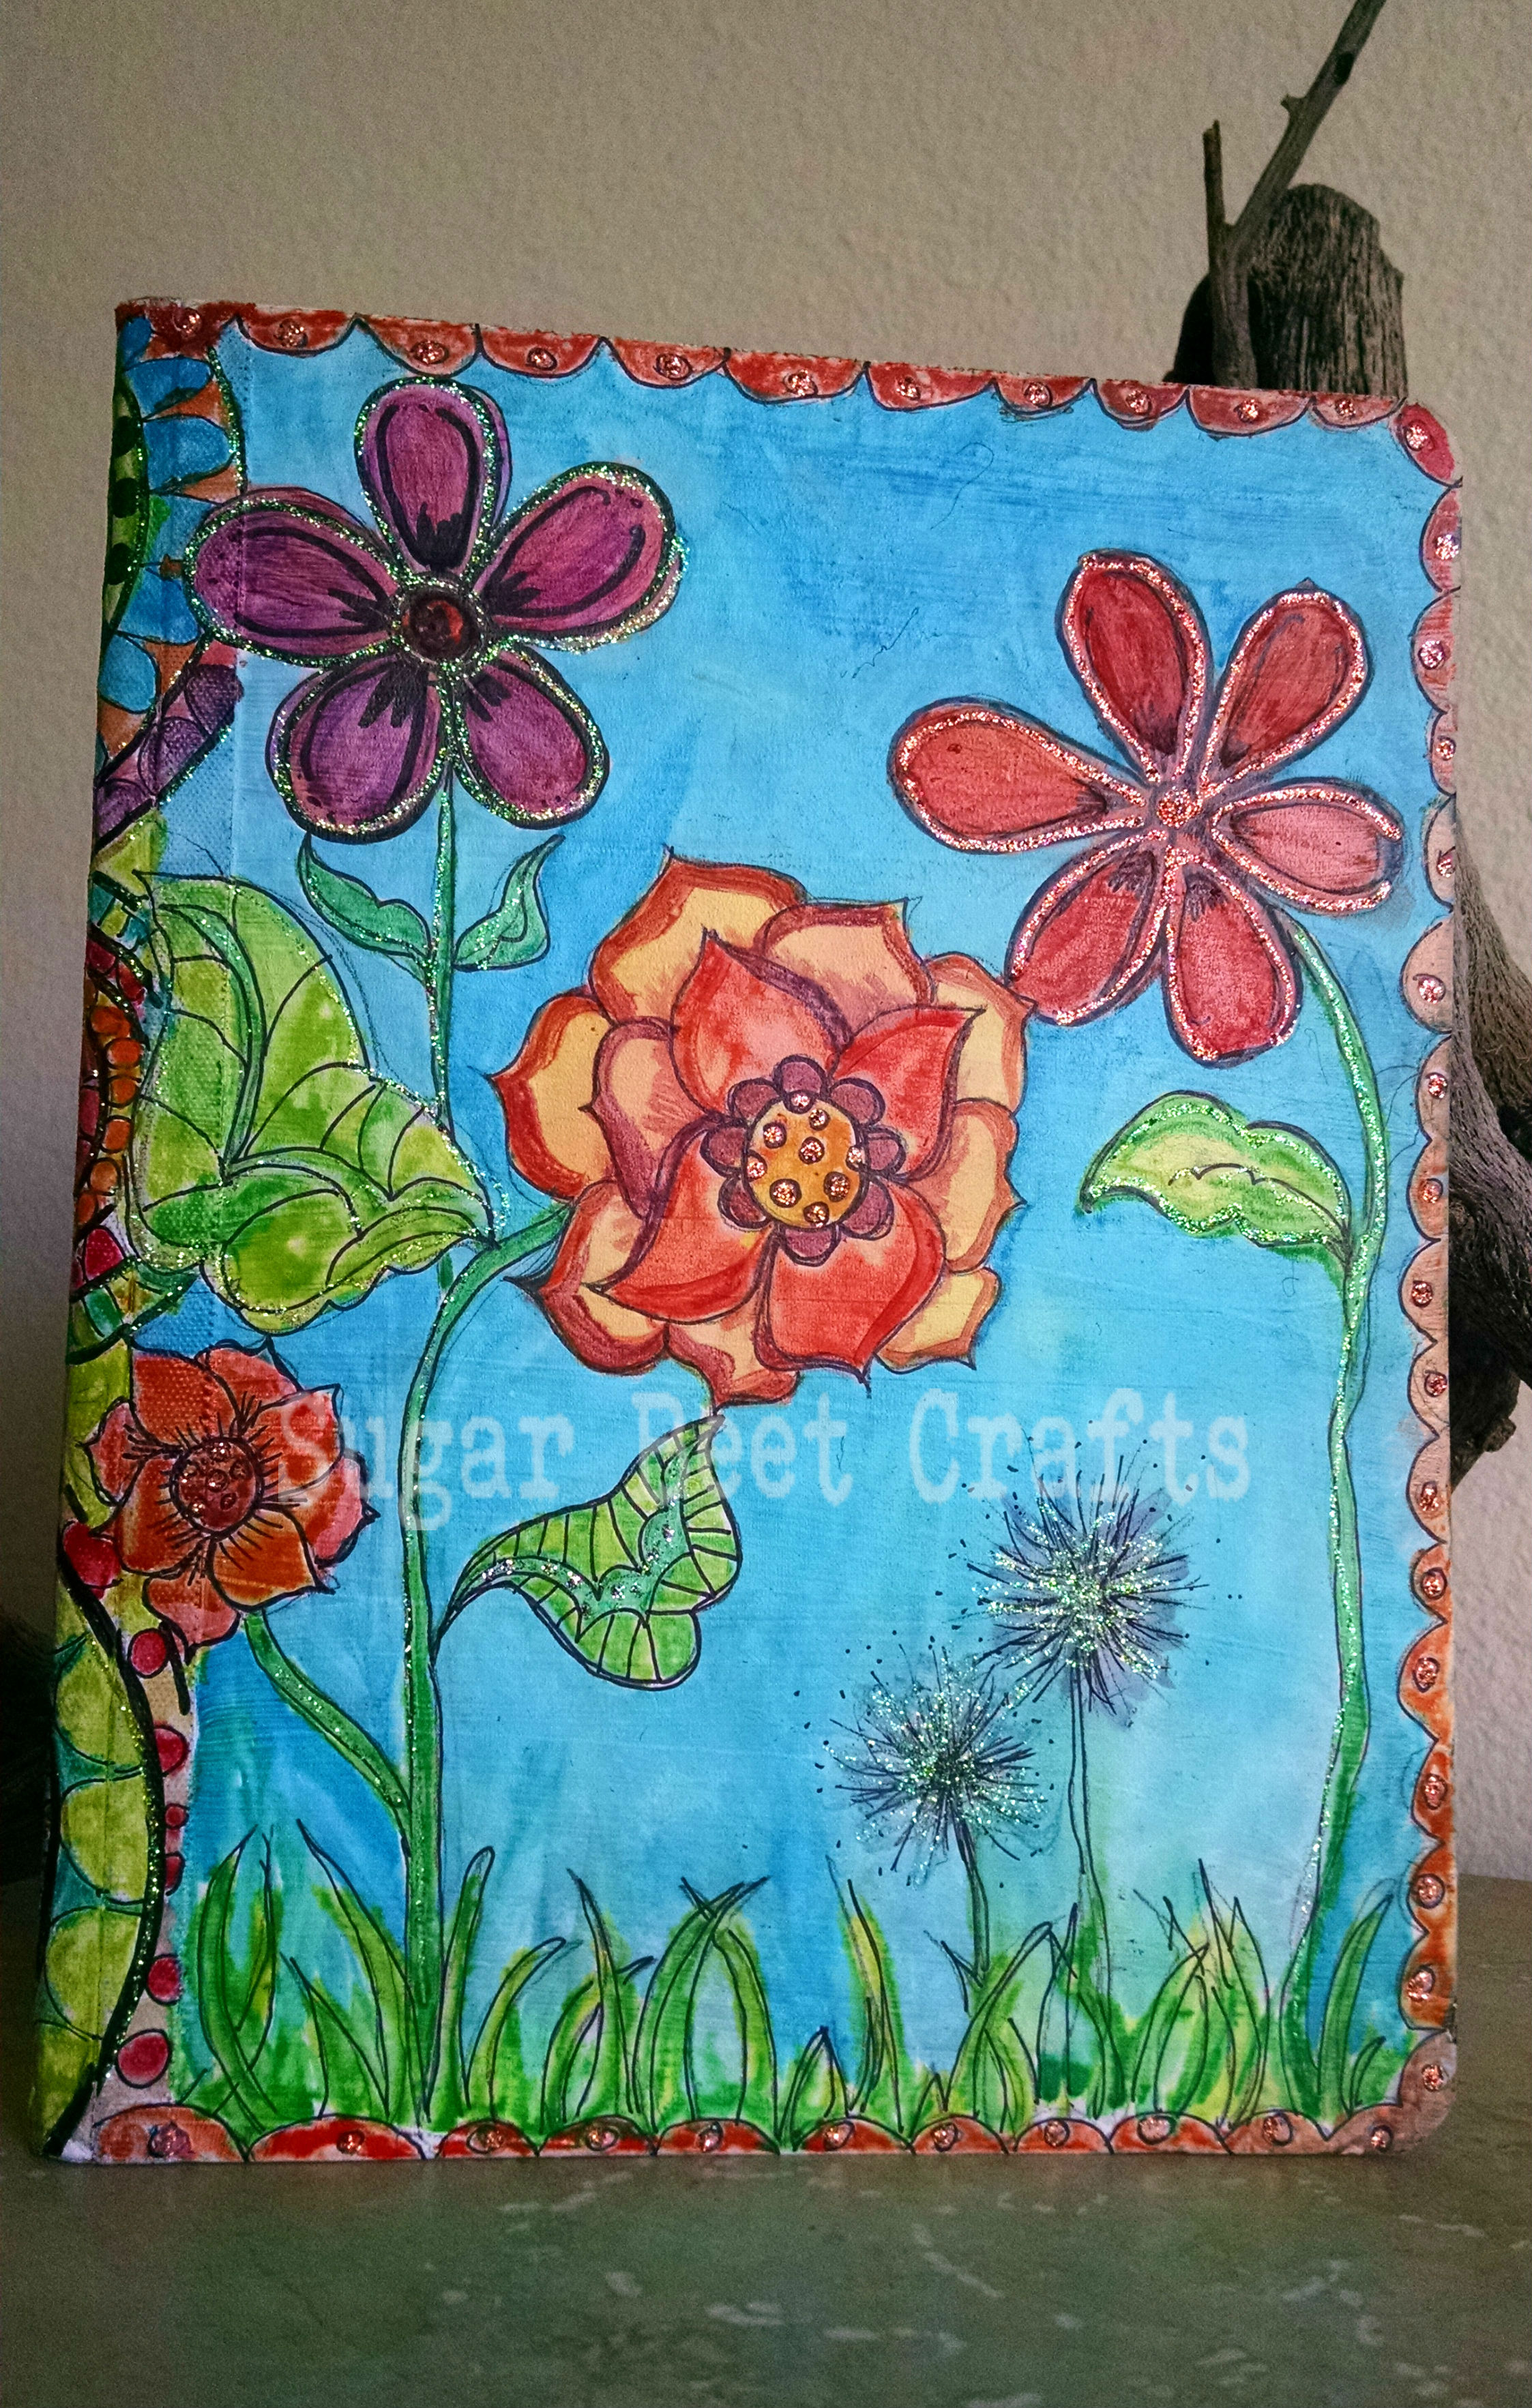
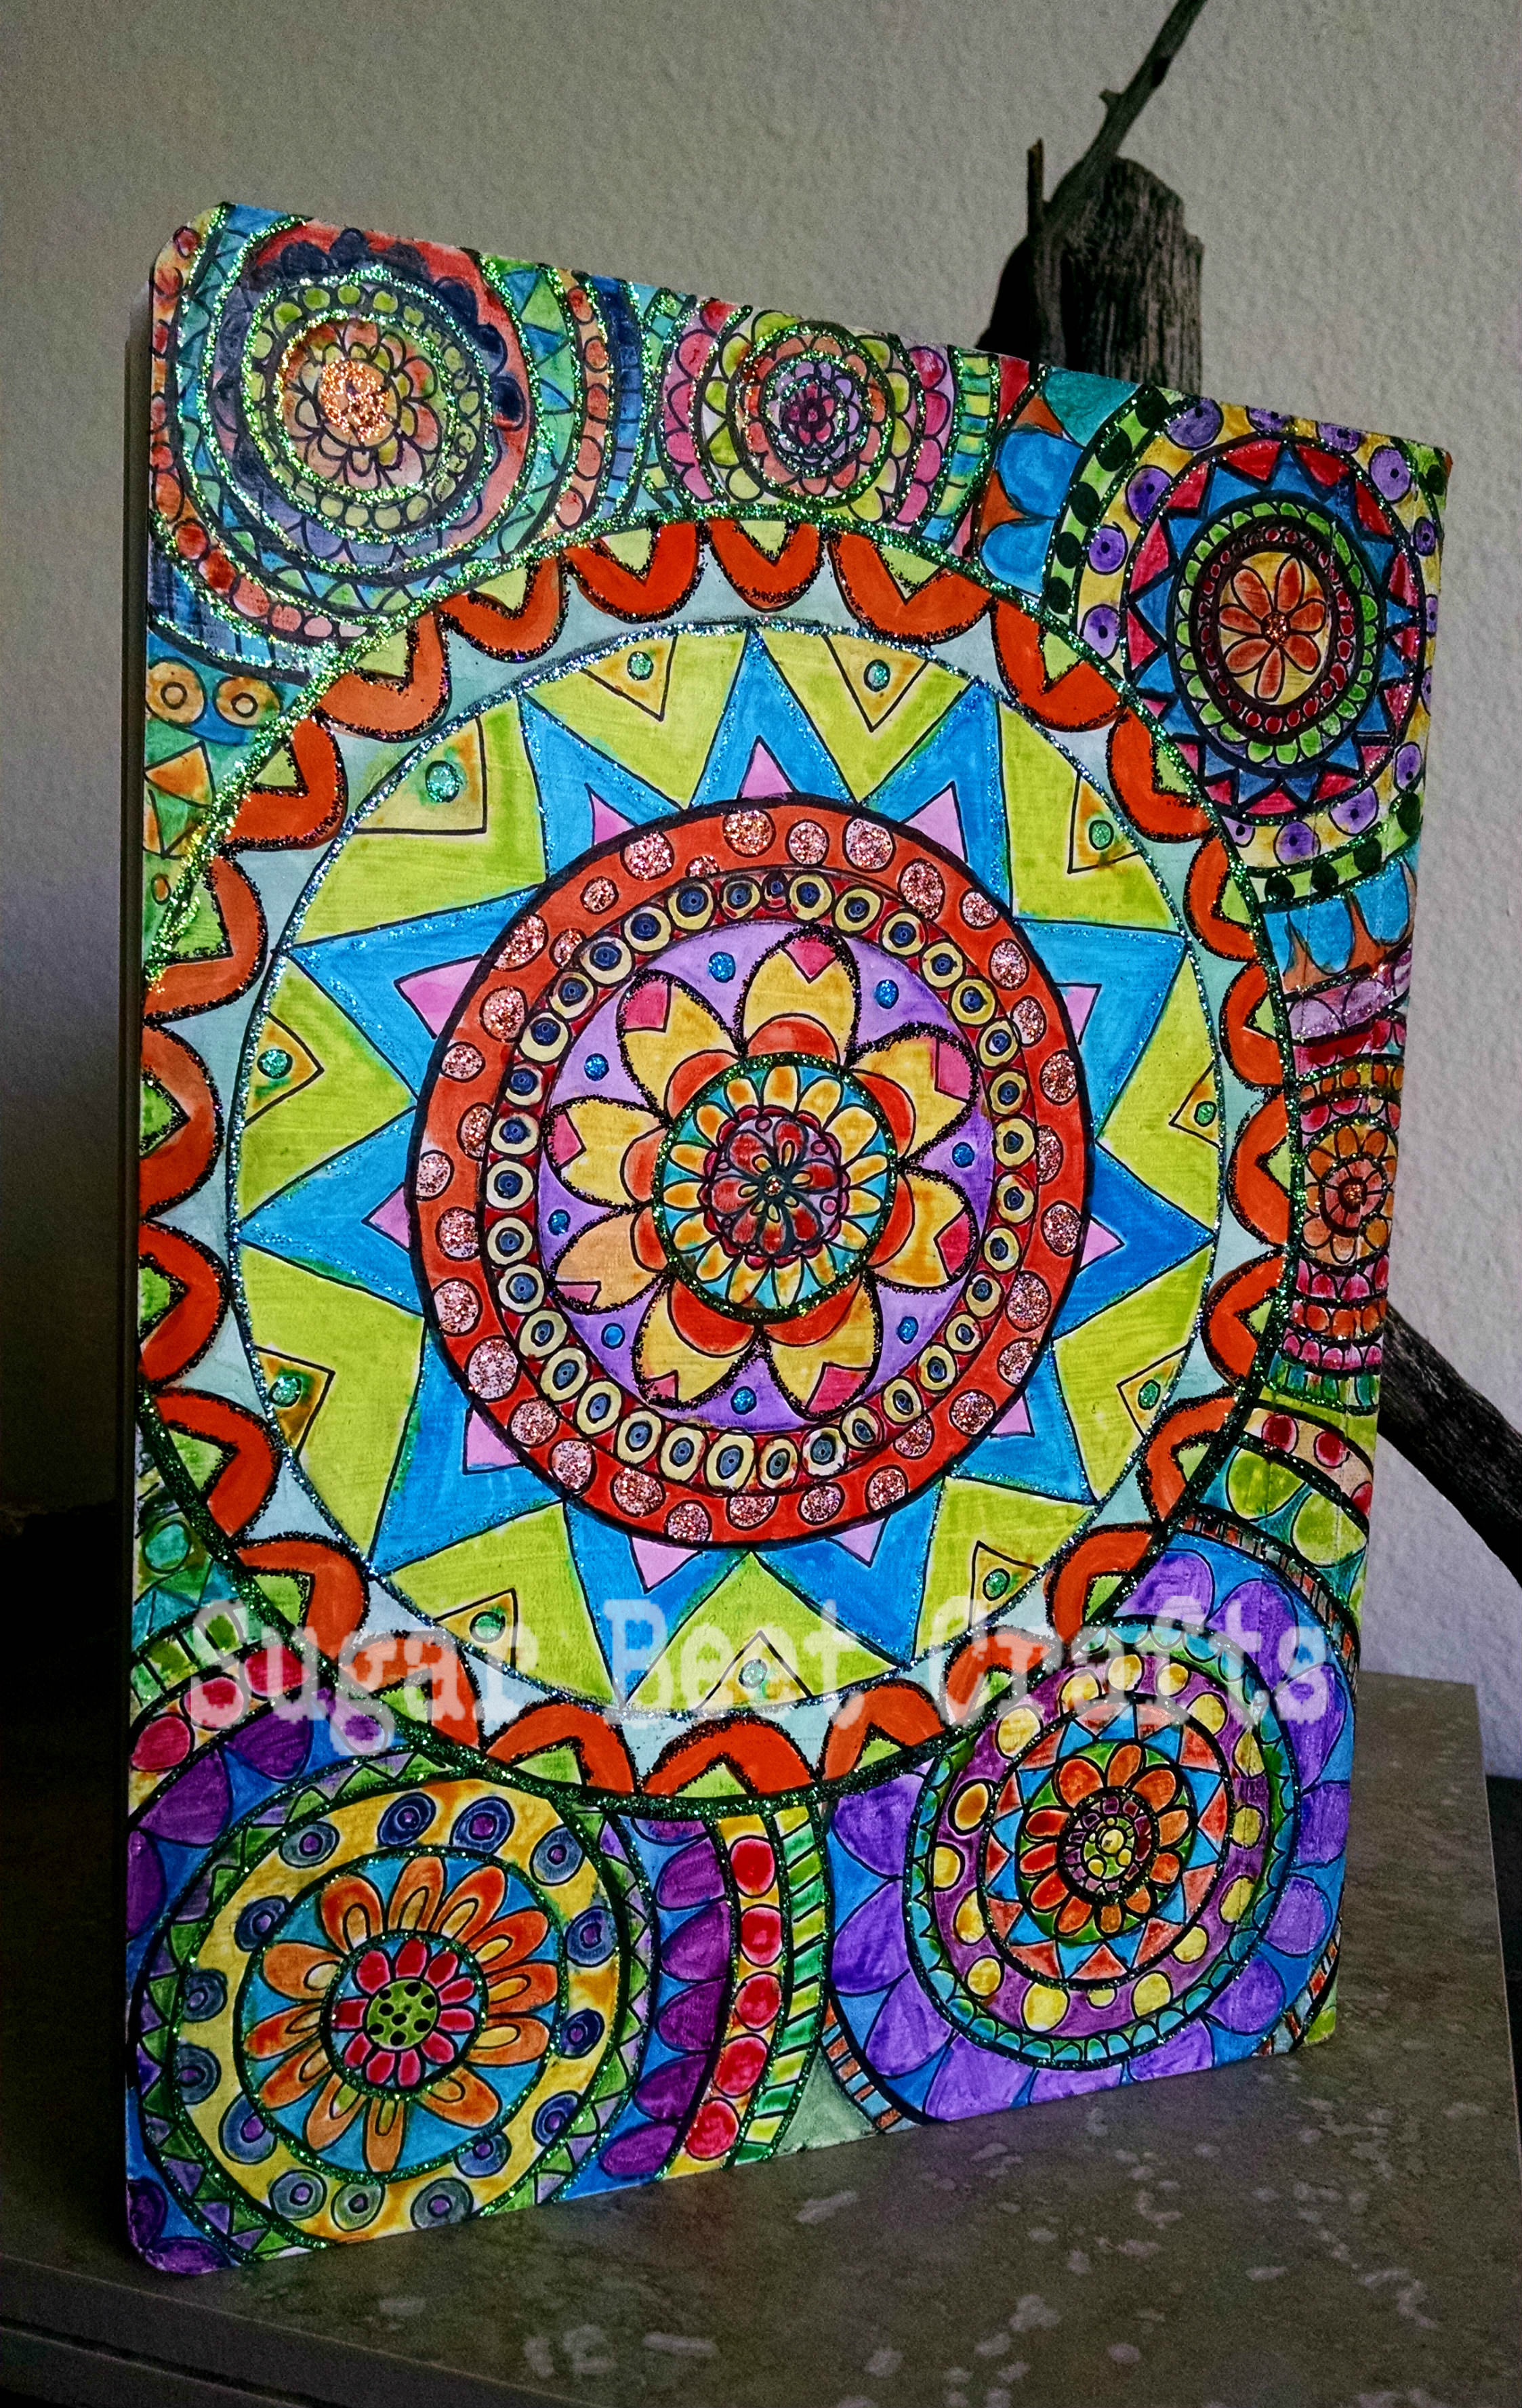
Here is another idea with Glitter. I did not write a tutorial on this one, but if you want one let me know.
Glitter Post Card!
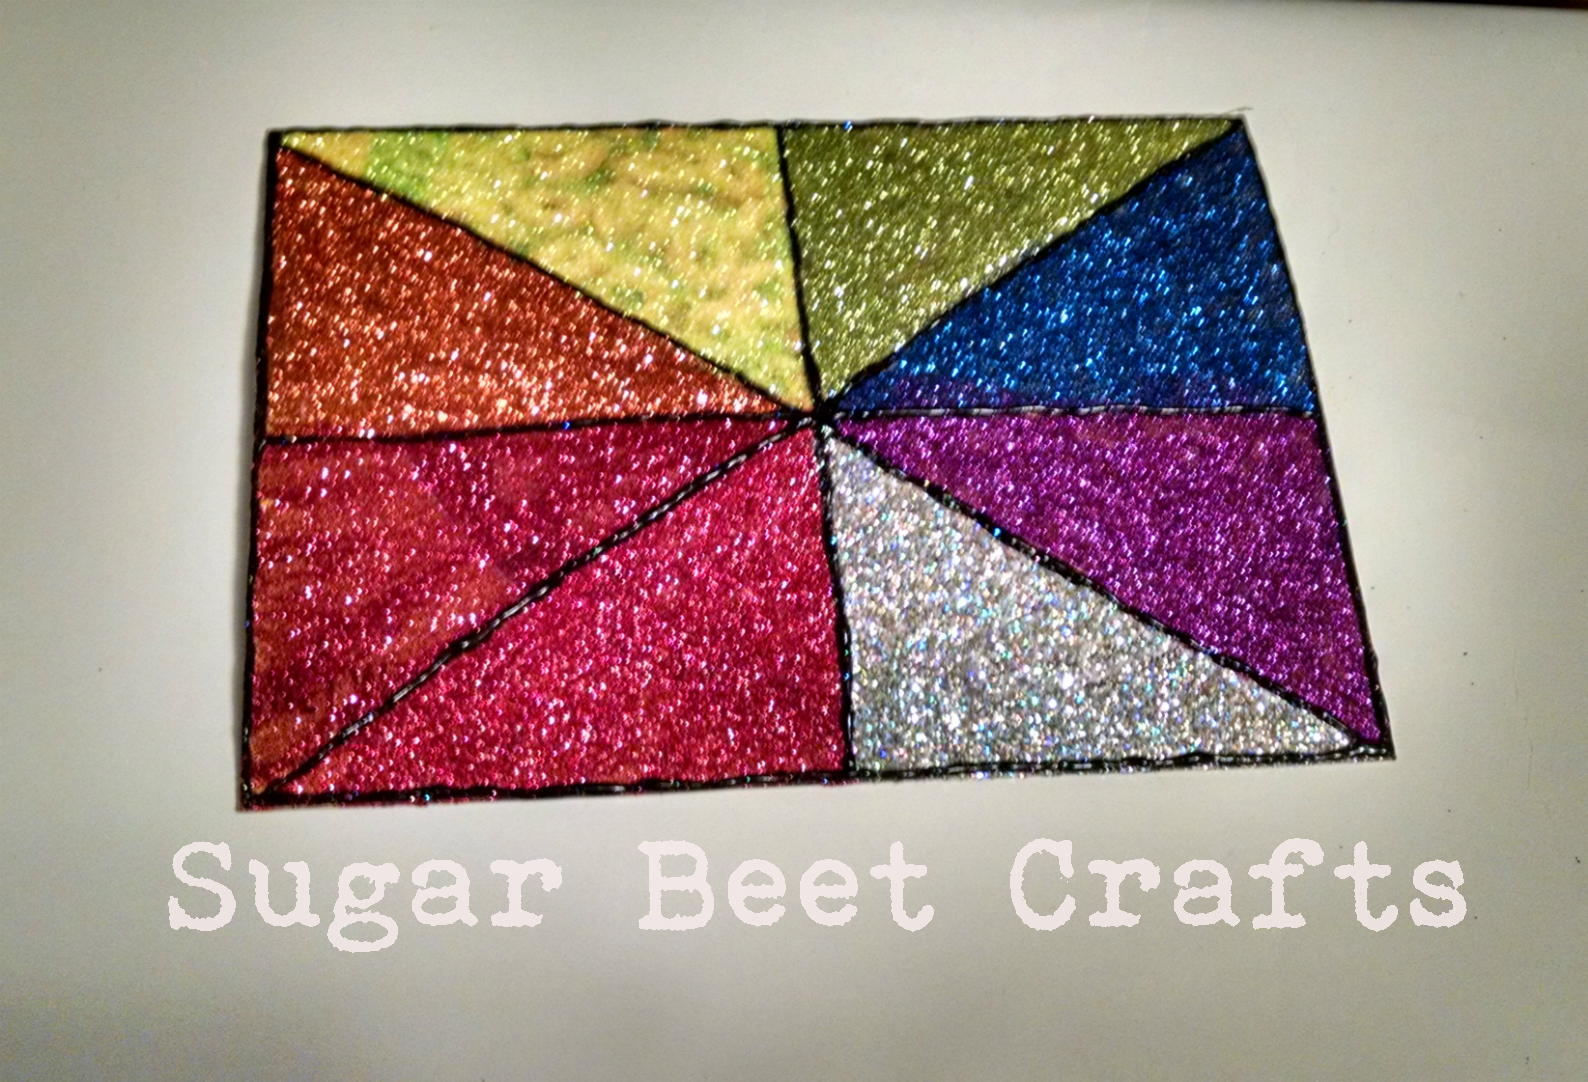
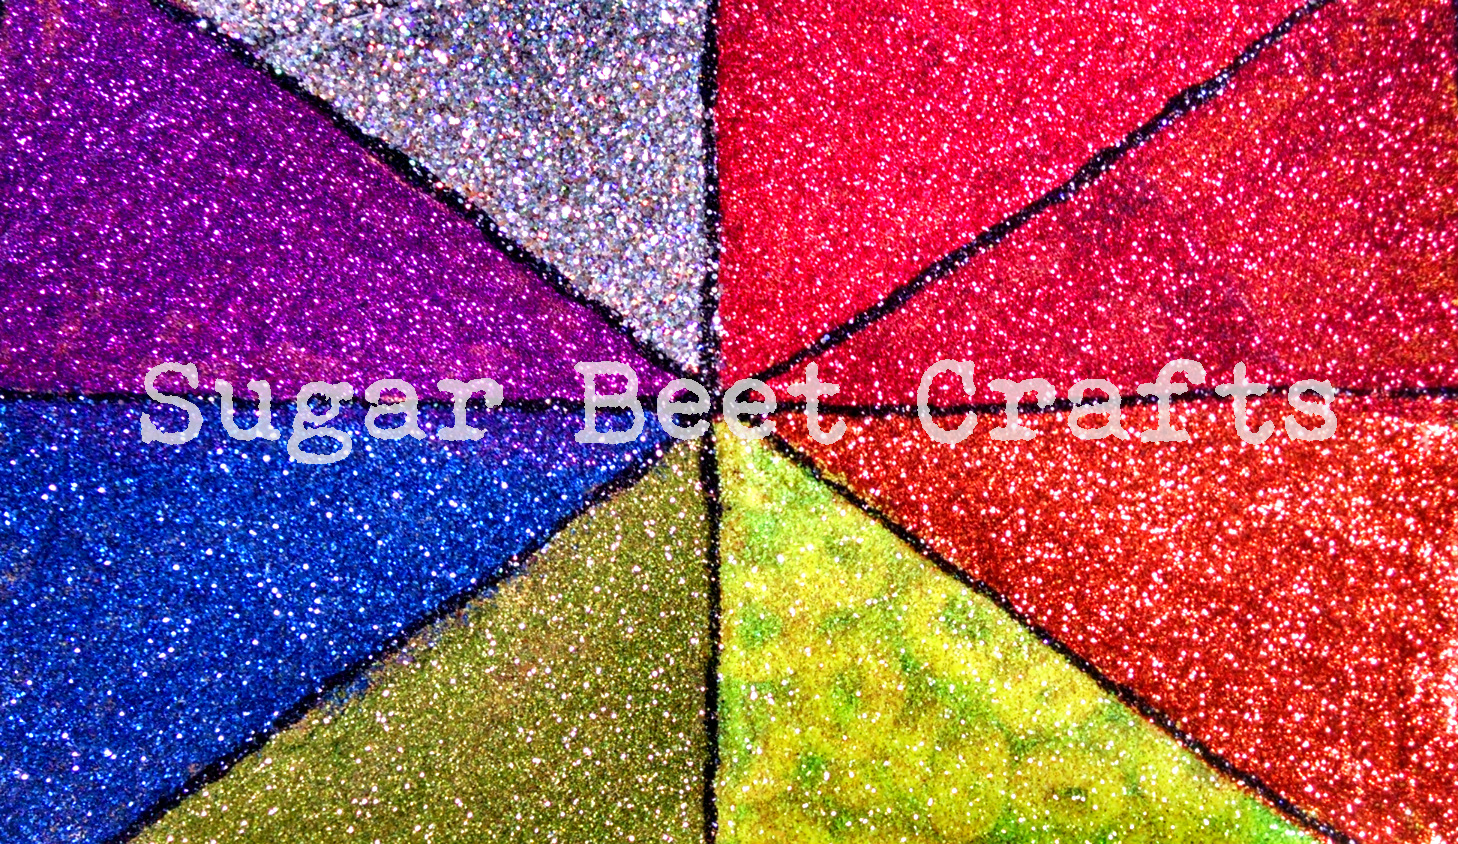
Can you imagine getting that in the mail!
I hope you enjoyed this tutorial!
I would love to hear what you think or even better, see your projects!
Feel free to link up to your related blogs in my comments! I love to spread the word on artists!
Have a fantastic week!!


You must be logged in to post a comment.